Repair Mesh
How to repair meshes in Asset Transformer Studio
Read time 5 minutesLast updated 10 hours ago
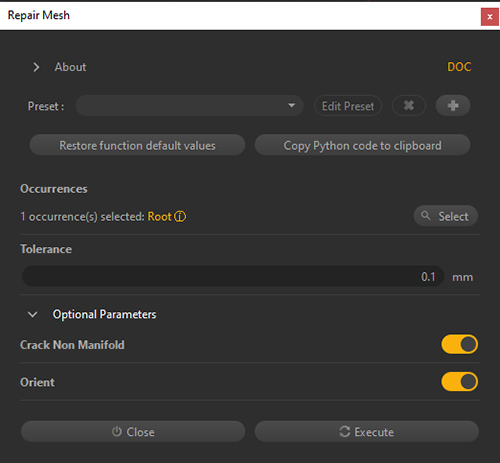
A good mesh repair is key for a good optimization.
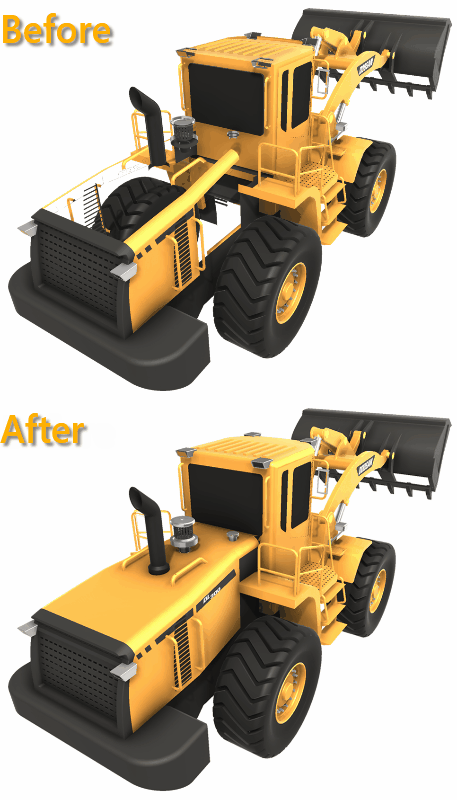
Before being optimized, a mesh needs to be clean: with connected edges, no overlapping triangles, with triangle faces oriented consistently and in the correct direction, etc.
A simple example showing how important repaired meshes are is decimation: see this page.
To repair meshes, use the Repair Mesh function, available in the Mesh menu.
What it does
The Repair Mesh function automatically performs several actions:
Detect and remove duplicate triangles
Some triangles can be duplicated multiple times and overlapping (meaning with coincident vertices), making the polycount too high and potentially creating visual artifacts (Z-fighting).
The process removes them: only one triangle is preserved. This is automatic — no parameter needs to be enabled in the dialog box.
Vertices welding (proximity tolerance)
This process welds, or merges, together vertices that have the same position (using a tolerance) but different attributes.
Typically, non-manifold borders of a mesh or hard edges are candidates for welding, and the welding will recreate connectivity information at those locations if vertices fall into the given tolerance.
The tolerance is given in the parameter:
Tolerance
The default value is 0.1mm and generally gives good results.
Sew mesh boundaries
To avoid visible gaps and cracks in the input mesh, this process sews (stitches) boundaries that are unconnected:
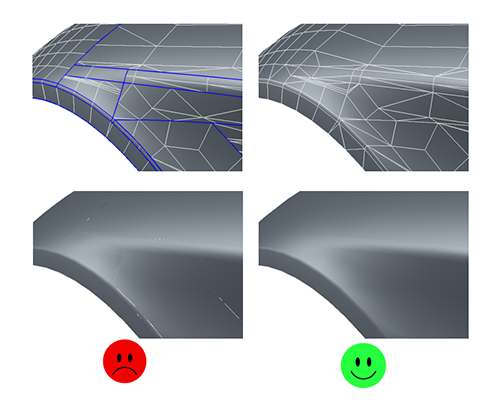
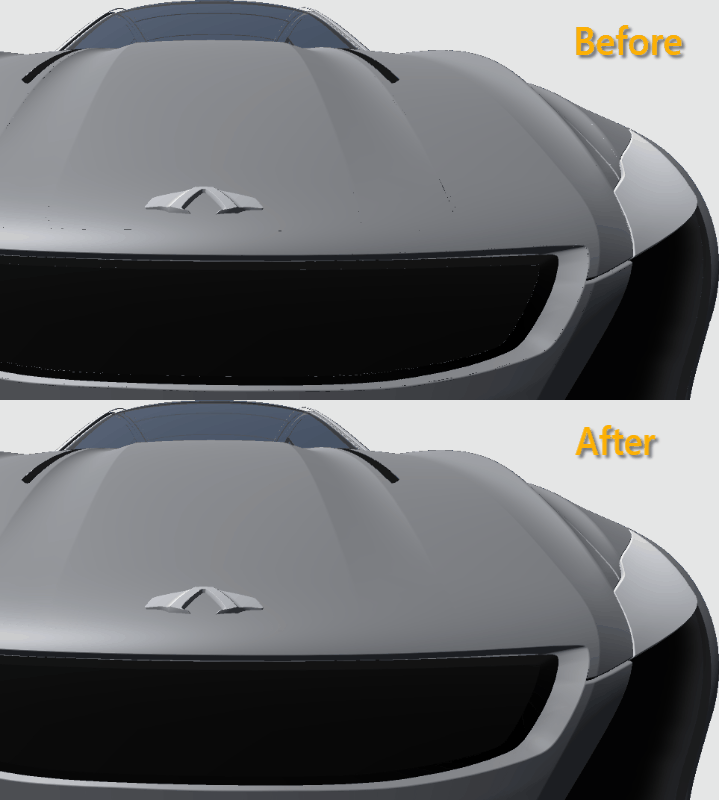
Unconnected boundaries are closed even if the vertices are not coincident, by fixing T-junctions:
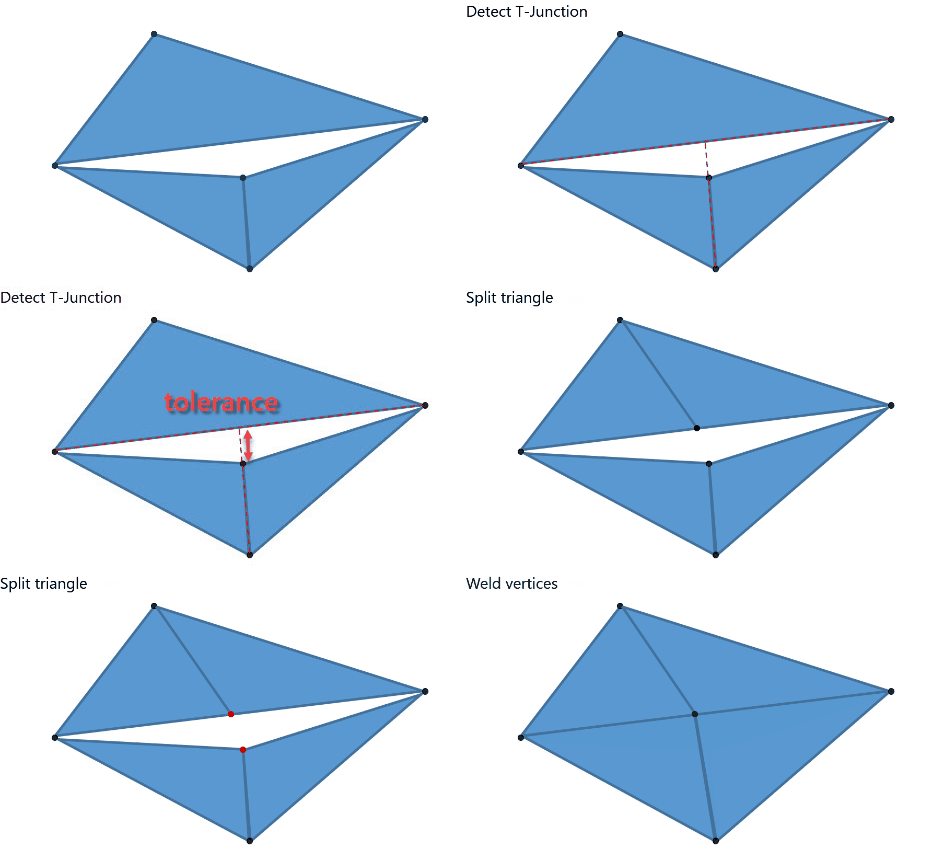
The tolerance is given in the parameter (the same value is used for welding and sewing boundaries):
ToleranceThe default value is 0.1mm and generally gives good results.
If gaps bigger than 0.1mm are observed on the meshes, this value needs to be raised — but not too much, to avoid removing gaps that are part of the mesh topology, like a hole or a marking.
Removing degenerate triangles
This process removes degenerate triangles, meaning triangles that are almost flat (all boundaries overlapping). This is automatic — no parameter needs to be enabled.
Fixing orientation of adjacent faces consistently
Orienting triangle faces consistently on a model's meshes is one of the biggest challenges in 3D data preparation.
Real-time 3D apps use single-sided materials (or shaders) in order to preserve performance, by rendering only the faces of the mesh that are visible to the camera/user.
This requires meshes to have their triangle faces properly and consistently oriented (see About Face and Vertex Normals).
In the Repair Mesh dialog box, when the parameter is enabled, the Orient Polygon Faces algorithm is run, trying to orient all the adjacent faces of each mesh consistently.
OrientThis actually does two things: find potential strips of triangles that form a Möbius strip and crack it. Then, orient triangles so that all triangles in the same strip are oriented the same way.
Although it fixes everything on most volumetric shapes (such as CAD models), the Orient Polygon Faces algorithm can have trouble orienting faces properly when dealing with surfaces or shells (as opposed to closed volumes).
To help the algorithm get the best result possible on this kind of mesh, the parameter splits non-manifold edges to get two or more manifold edges, when possible.
Crack Non ManifoldOther functions and methods are available to help orient the faces of a model correctly:
-
Automatically or semi-automatically using the dedicated functions in the Mesh menu:
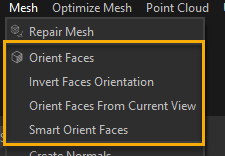 For example, Orient Faces From Current View and Orient Faces (Advanced) will generate points of view to help get a correct face orientation.
 -
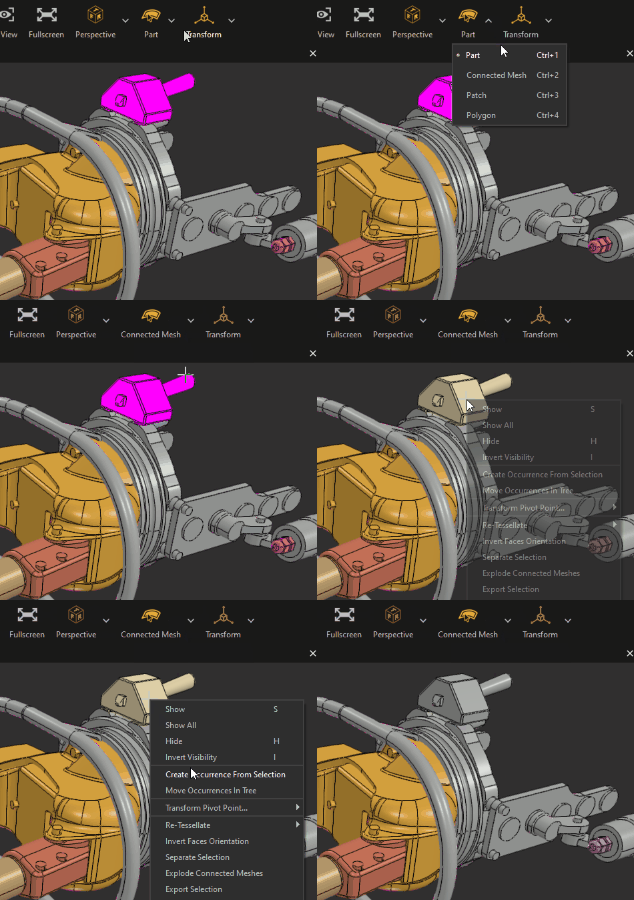
Manually: by manually selecting faces in the scene with the Selection mode and using the Invert Faces Orientation command:
General behavior
The Repair Mesh function repairs the meshes existing in a part independently from other parts of the scene.
So, if 2 mesh boundaries need to be stitched together and if some triangle faces need to be oriented consistently to each other, they need to be in the same part.
Use the merging functions from the Scene menu to merge parts together.
If no part is selected in the scene, Repair Mesh will be executed on all parts of the scene (hidden parts included). If you wish to repair only some targeted parts, select them first.
Example
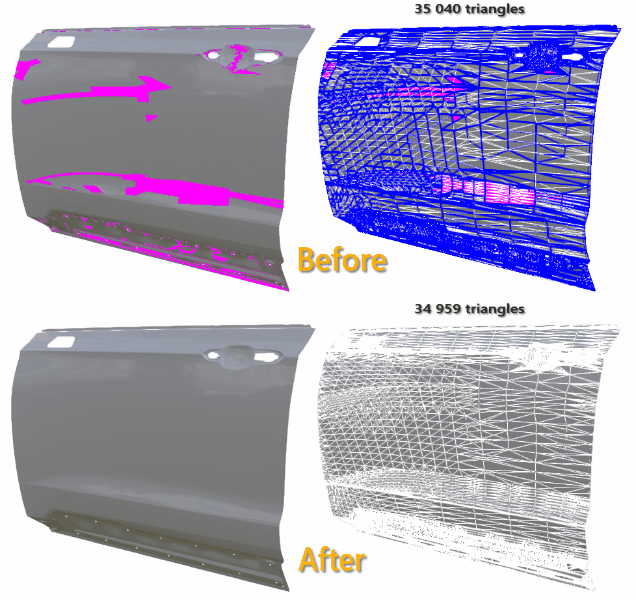
Here is an example of a mesh that requires repair: a car door with disconnected edges (blue edges) and inverted triangle faces (pink faces).
Applying the Repair Mesh function with default values repairs the mesh, saving a few triangles, and making it ready for use or further optimization.
To go further
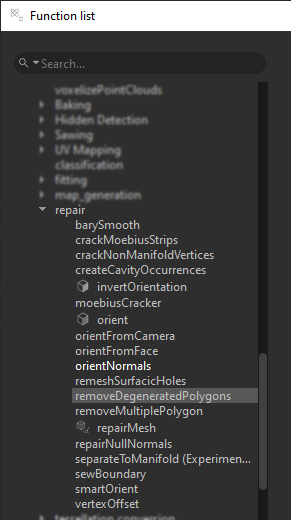
Beside Repair Mesh, there are many mesh repair functions available. You can find them in the Function List (F12) in the module.
AlgoEach subprocess of Repair Mesh explained above can be found as a unitary function, giving more control over the parameterization:
- Remove Degenerated Polygons: removes almost flat polygons (within the given tolerance)
- Merge Vertices: welds vertices (see above)
- Orient Normals: orients vertex normals consistently with face normals (see About Face and Vertex Normals)