Material Editor
How to manage materials in Asset Transformer Studio using the Material Editor
Read time 1 minuteLast updated 9 hours ago
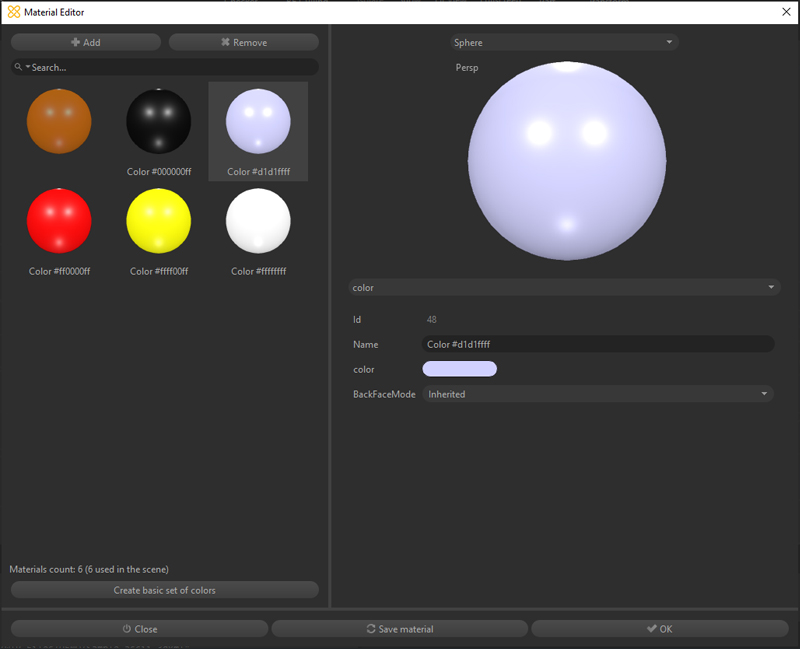
The Material Editor allows you to manage the materials of the scene. It is accessible from the Materials menu or by clicking the Materials button in the Main Toolbar.
Item | Description |
|---|---|
| Add Button | Creates a new material. Choose the type of material (shader) to create: standard, color, PBR, or unlit texture. |
| Remove Button | Removes the currently selected material from the scene. All objects that used the removed material will appear gray in the viewport (exported without material). |
| Materials List | Lists all the materials available in the scene. By default, the list is empty. When importing a 3D file, all materials from the imported file are added to the Materials List. |
| Search Bar | Filters the Materials List to materials whose name contains the typed text string. |
| Materials Settings | Displays all the settings for the currently selected material. Material settings must be adjusted from here. |
| Save material button | Must be clicked after changing material settings. If not clicked, a |
| Create basic set of colors button | Automatically creates 14 color type materials, ready to be used for project review purposes (part identification, revision…). |
| Close button | Closes the Material Editor. |
| OK button | Applies modifications made to the selected material settings and closes the Material Editor. |