Setting up Pixyz UI
Pixyz SDK comes with a copy of Pixyz UI. Depending on the setup, there are multiple ways to launch it.
Read time 2 minutesLast updated 3 days ago
Prerequisites
To run Pixyz UI, it is necessary to have Python installed on your machine. We recommend version 3.10 or newer.Installation via pip
Open Pixyz UI
After the initial setup of Pixyz SDK for python via pip, Pixyz UI is already installed. To launch the UI, open a terminal and activate the virtual environment. Then, runorpxzui
Both are executables in your virtual environment's Script folder. Sometimes it can be useful to create a shortcut on windows to have Pixyz UI ready without opening a terminal. To do so, just right-click onpixyzui
<VENV>/Scripts/pxzui.exe<VENV>Inspect Pixyz UI's sources
To better understand what Pixyz UI is doing in order to write your own UI with pixyz or extend Pixyz UI with your functionality, its sources are accessible. Inside of the virtual environment, there is a folder<VENV>/Lib/site-packages/pxzuiInstallation via downloaded zip
There are multiple ways to run Pixyz UI after downloading the zipped Pixyz SDK from pixyz-software.com.Windows
Start from Batch File
We recommend executingPixyzUI.batcd PixyzUI./PixyzUI.bat
Developer setup
If you wish to check under the hood of Pixyz UI or want to develop your own UI application, we recommend you to set up Pixyz UI with PyCharm. Open the Pixyz UI folder viaFile/Open...PixyzUI/.venv
python -m venv .venv.\.venv\Scripts\activatepip install -r .\requirements.txt
In order to launch main.py, you will need to pass the path to the binaries as a parameter. They are in the
bin../bin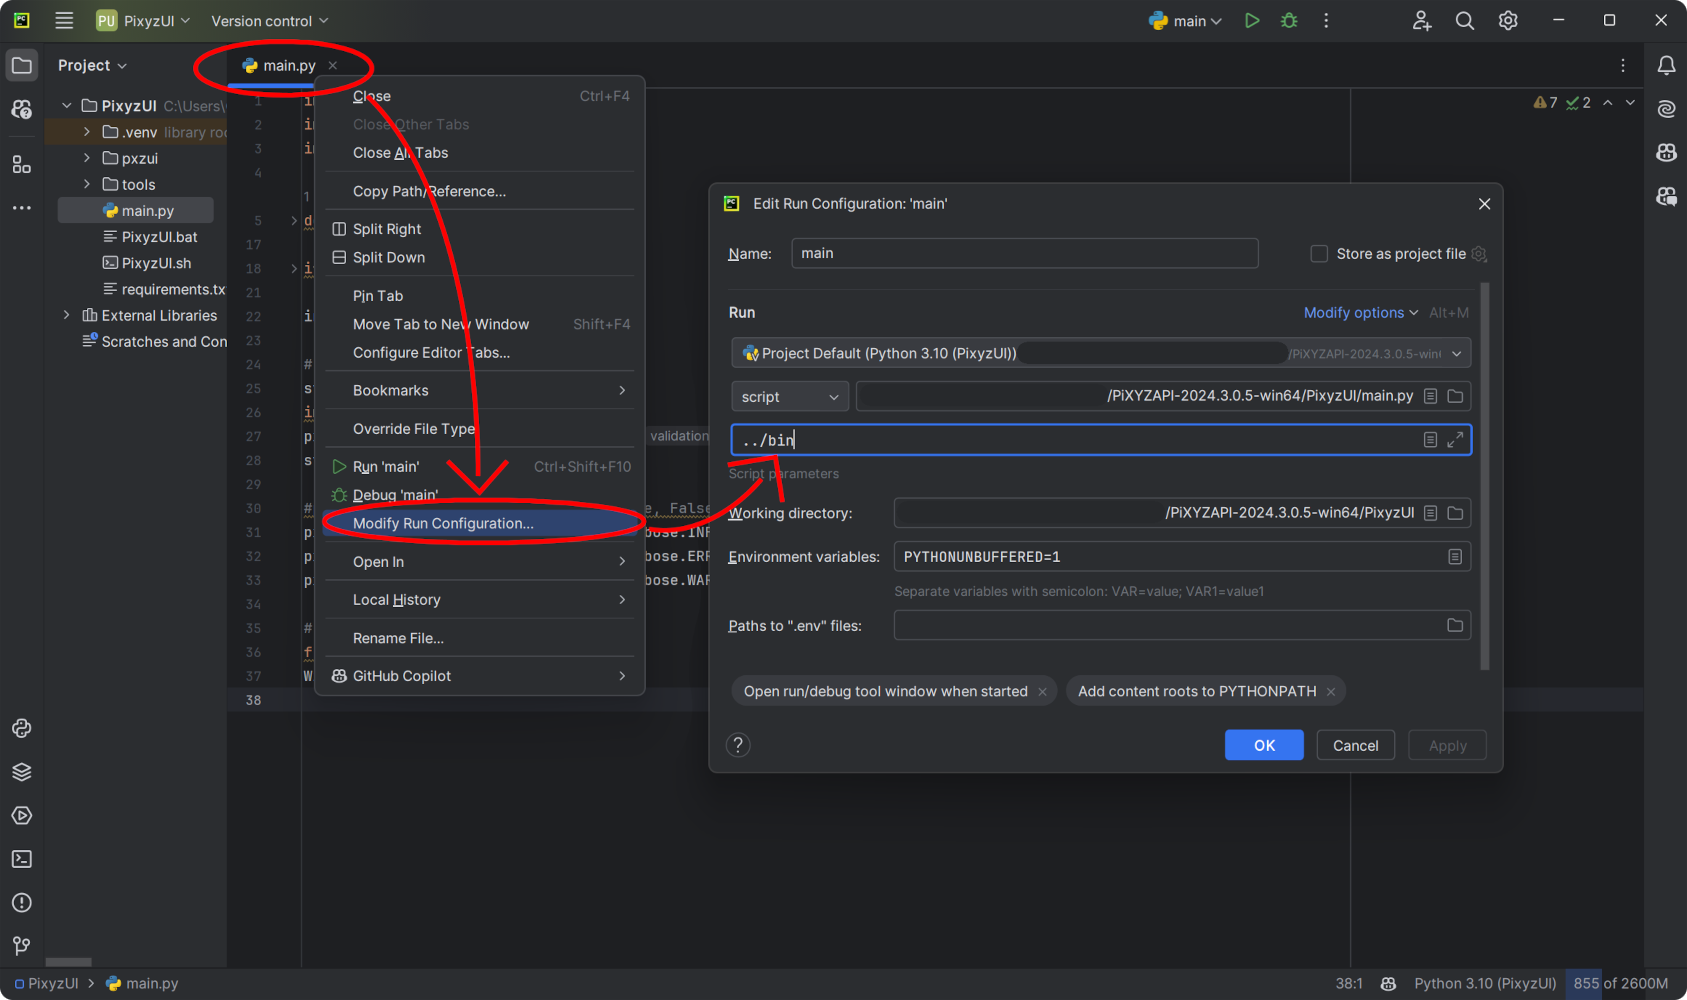
Keep in mind that the python interpreter won't automatically discover the modules of the sdk for autocompletion, unless you add the binaries to your interpreter path. Check out the PyCharm installation instructions in Pixyz SDK Setup on how to do that.python main.py "../bin"