Pixyz UI Overview
This page provides an overview of the Pixyz UI, covering model import, navigation controls, selection modes, and ways to execute SDK functions.
Read time 2 minutesLast updated 2 days ago
The Pixyz UI is a simple interface where you can test Pixyz SDK functionality on your models and familiarize yourself with Pixyz concepts. When you open it for the first time, you will see our DefaultUI, the following is a short overview of its functionality. If you want to modify it or create your own, see Create a Custom UI.
Importing a model
To import any file, just drag and drop it on the Pixyz UI. A list of supported file formats can be found here. Alternatively, you can select a file viaIO/Import FileNavigation
| Camera Rotation | Set Rotation Center | Camera Panning | Camera Zoom | Selection | Depth Selection |
| ALT + LMB (drag) | MMB click | ALT + MMB (drag) | ALT + RMB (drag) or scroll wheel | LMB | RMB |
Selection
| New Selection | Invert Selection | Add To Selection | Remove From Selection |
| LMB | CTRL + LMB | CTRL + SHIFT + LMB | SHIFT + LMB |
Selection modes
It is possible to select either Connected Meshes, Edges, Parts (default), Patches or Polygons. However, note that almost all algorithms can only work with occurrences that are selected using thePartExecuting Pixyz SDK functions
Function Browser
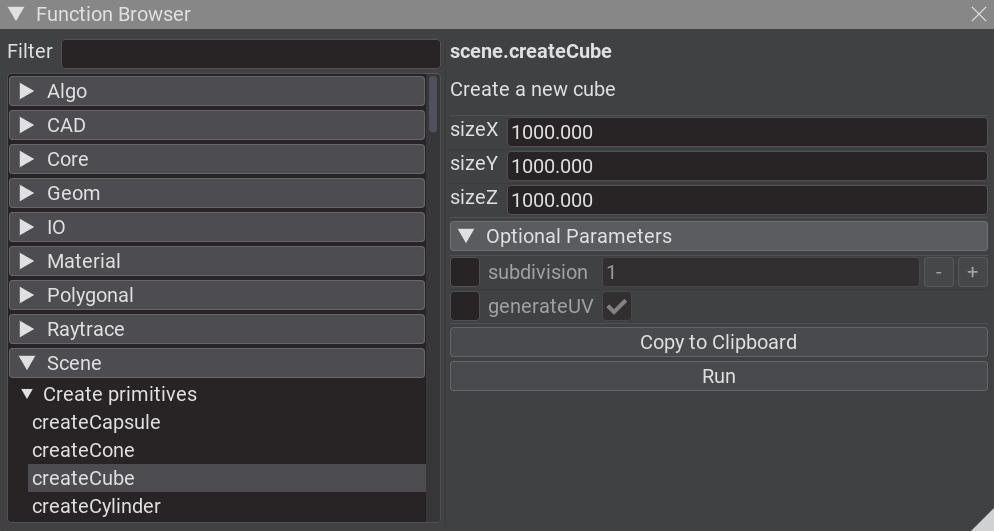
Windows/Function BrowserCommand Palette
There is also a simple Command Palette available, which can be opened with Ctrl+Shift+P. You can search for functions and press Enter to open a popup which enables you to execute that function. This is not different from the Function Browser, but more convenient for working quickly.Scripting
Additionally, there is a scripting window which can be opened viaWindows/ScriptingModifying Preferences
Pixyz SDK properties can be modified viaWindows/PropertiesWindows/VisualizationAdditional Functionality
Pixyz UI comes with multiple predefined windows, which can be accessed via theWindows