Guided Import
Using the Guided Import mode in Asset Transformer Studio
Read time 3 minutesLast updated 10 hours ago
In Asset Transformer Studio, the user chooses how a 3D model is imported within the application: using the Raw import mode, or the Guided import mode (see Import mode preference).
Compared to the Raw import mode, the Guided import mode is a simplified, guided method to import a 3D model in the scene.
What it does
The Guided import mode is an automatic import process, and is essentially the promise of easily getting a perfectly converted 3D model, from any 3D source/format, be it a CAD, polygonal or point cloud model, without needing to heavily retouch the imported model through a complex suite of data preparation features, and without needing to preconfigure the software's import options.
When importing a 3D model through the Guided import mode, the user simply defines a few input options, before triggering the import. Then, Asset Transformer Studio automatically runs a universal data preparation scenario, which analyzes the model and processes it to get a perfect 3D model, with 100% quality, ready to be exported, or to be furthermore optimized using Asset Transformer Studio's optimization features (Decimation, Remove Occluded Geometries, Remove Holes…)
Who is it for?
The Guided import mode is intended for novice users, who do not have much knowledge about 3D data preparation, and in need of a simple conversion solution.
But it is also convenient for advanced users that want to rely on Asset Transformer expertise, embedded in the data preparation scenario run with the Guided import, or want to leverage the embedded features to gain time and productivity.
Any limitations?
The Guided import scenario is not entirely magical, so the imported model might still require some fine-tuning afterwards, whether it's mesh face orientation fixing, parts merging, parts renaming, materials assignment, UVs adjustments… pretty much any data preparation step required to obtain a 100% quality model, fitting your project's requirements.
Also, the Guided import process might take a bit of time in some cases, as it involves a succession of functions potentially time-consuming with very large models. The important thing being the result!
Comparison with the Raw import
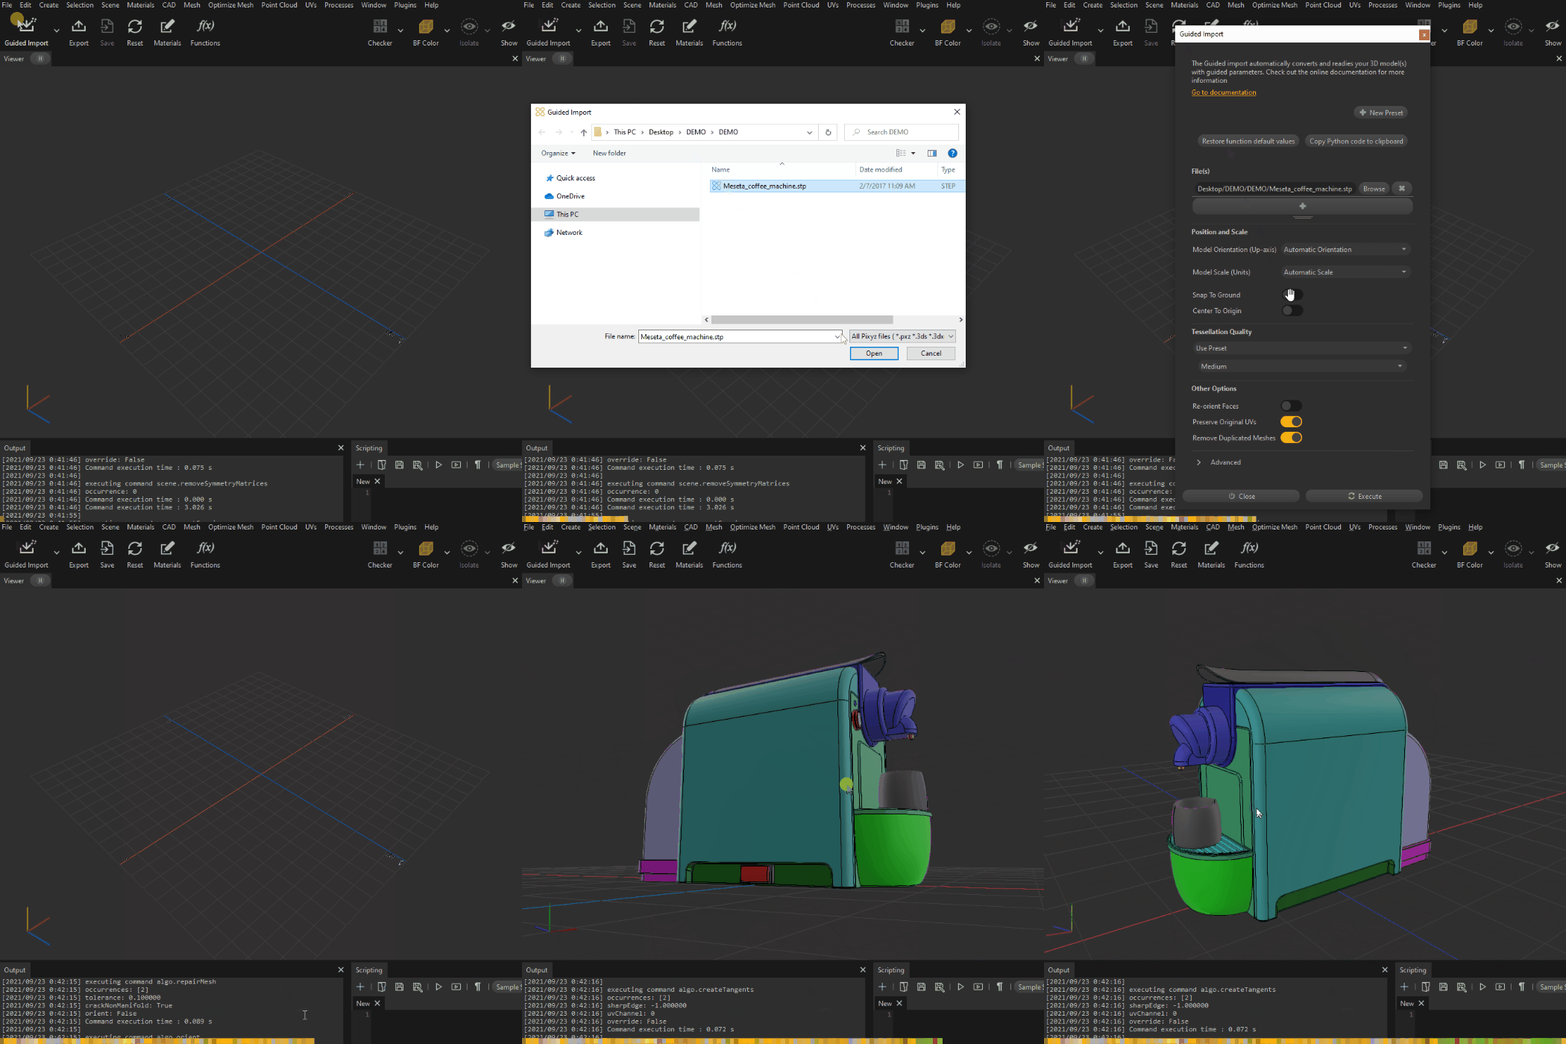
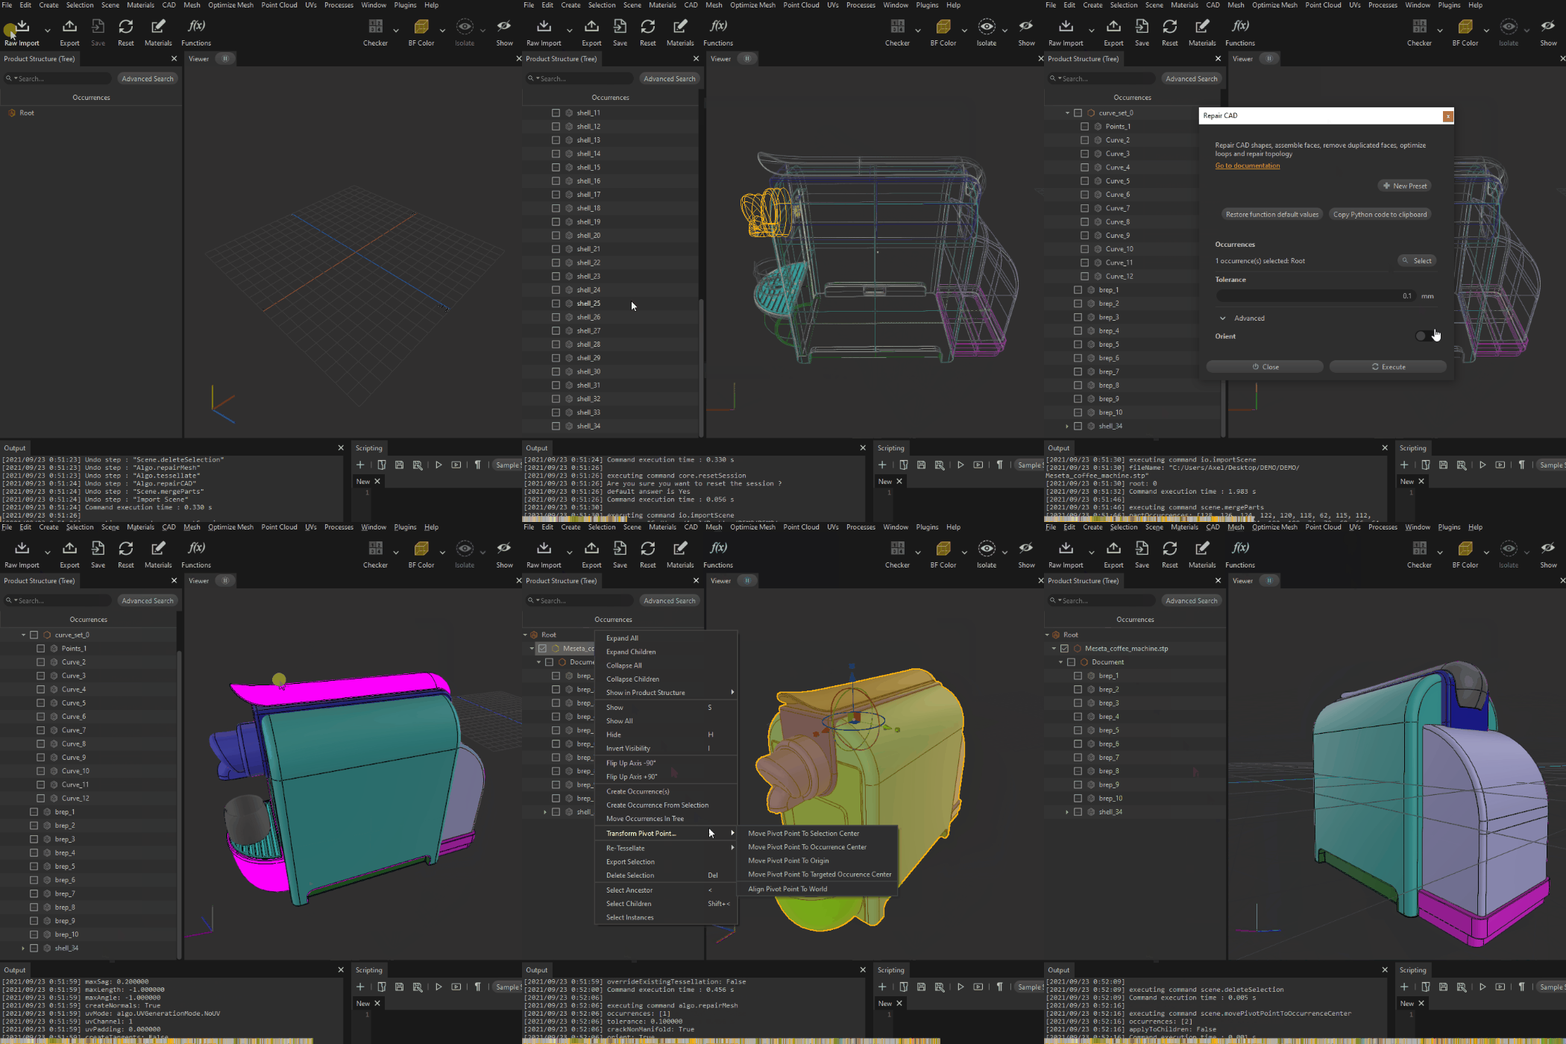
Find below a comparison between the Guided import mode and the Raw import mode, with a simple CAD model example.
Beside the speed of the Guided import compared to the Raw import, this example shows that it can be tricky for novice users to find the good data preparation recipe, meaning the correct sequence of features to run in order to obtain a model with the same level of quality:
Guided import | Raw import | ||
|---|---|---|---|
| **2 steps \ | ~3 seconds process** 1. Define import options in the Guided import window (Snap to ground, Center to origin, Tessellation = Medium quality, other options = default). 2. Click the Execute button. | **+20 steps \ | ~3 minutes process:** Import the file, analyze open shells, delete unwanted lines and points, merge separated surfaces, run RepairCAD, tessellate, run RepairMesh, apply UVs, reposition the model, and more. |
 |  |
How To
Once the Import mode preference is set as the Guided import, import a 3D model in Asset Transformer Studio using all the available possibilities:
- By dragging and dropping the file in the interface
- From the Guided import icon in the Main toolbar
- By doing File menu > Guided import
Once you chose the files to import, a dialog box appears, allowing to set the import options:
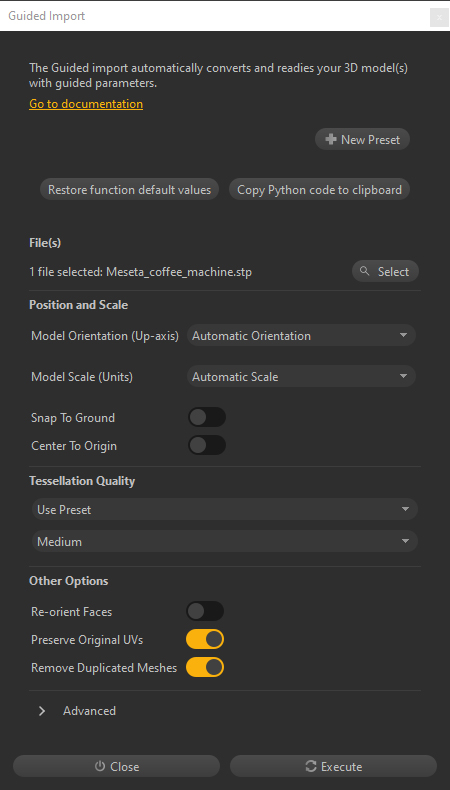
For more information about each option available to define the Guided import process, please have a look at the dedicated documentation page.