Documentation

​
​

Development

User Acquisition

Monetization

Industry

Asset Transformer Studio

2026.5.0

Supported
​

User Manual

Python API

Changelog

Asset Transformer Studio

2026.5.0

Supported
​

​
​
Get started
  • About Asset Transformer Studio
  • Getting started
  • Additional Resources
User Interface
  • Overview
  • Menu Bar
  • Toolbars
  • Window
    • History
    • Inspector
    • Output
    • Product Structure (Tree)
    • Scripting
    • Tools
      • Selection Tool
      • Cutting Plane
      • Exploded View
      • UV Projection Tool
    • Variants and PMI
    • Viewer
    • Visualization
  • Customizing the User Interface
Data Preparation Fundamentals
  • Overview
  • General Information
  • Typical Data Preparation Workflow
  • About 3D Models Types
  • About the Product Structure (Tree)
  • About Occurrences
  • About Instances & Prototypes
  • About Face and Vertex Normals
  • About UVs
  • About Tessellation
  • About Decimation
  • About Animation
  • Glossary
Working With Asset Transformer Studio
  • Overview
  • Videos and Tutorials
  • Supported File Formats
  • Importing Files
  • Exporting Files
  • Scripting With the Python API
  • Interrupting a Process
  • Plugins
  • Errors in Asset Transformer Studio
Python API Reference
  • Overview
Changelog
  • Changelog
  1. Asset Transformer Studio
  2. User Interface
  3. Window
  4. Tools

UV Projection Tool

Using the UV Projection Tool in Asset Transformer Studio
Read time 3 minutes
Last updated 9 hours ago

Concept of Materials & Textures Mapping (UVs)

Texture mapping is a method for defining high frequency detail, surface texture, or color information on a computer-generated graphic or 3D model. It originally referred to diffuse mapping, a method that simply mapped pixels from a texture to a 3D surface ("wrapping" the image around the object). (wikipedia)
In other words, if you want to apply a material which uses textures (unlit-texture materials, PBR materials like our realistic materials library) your parts need to have a texture mapping (what they call UV Mapping in CAD concept).
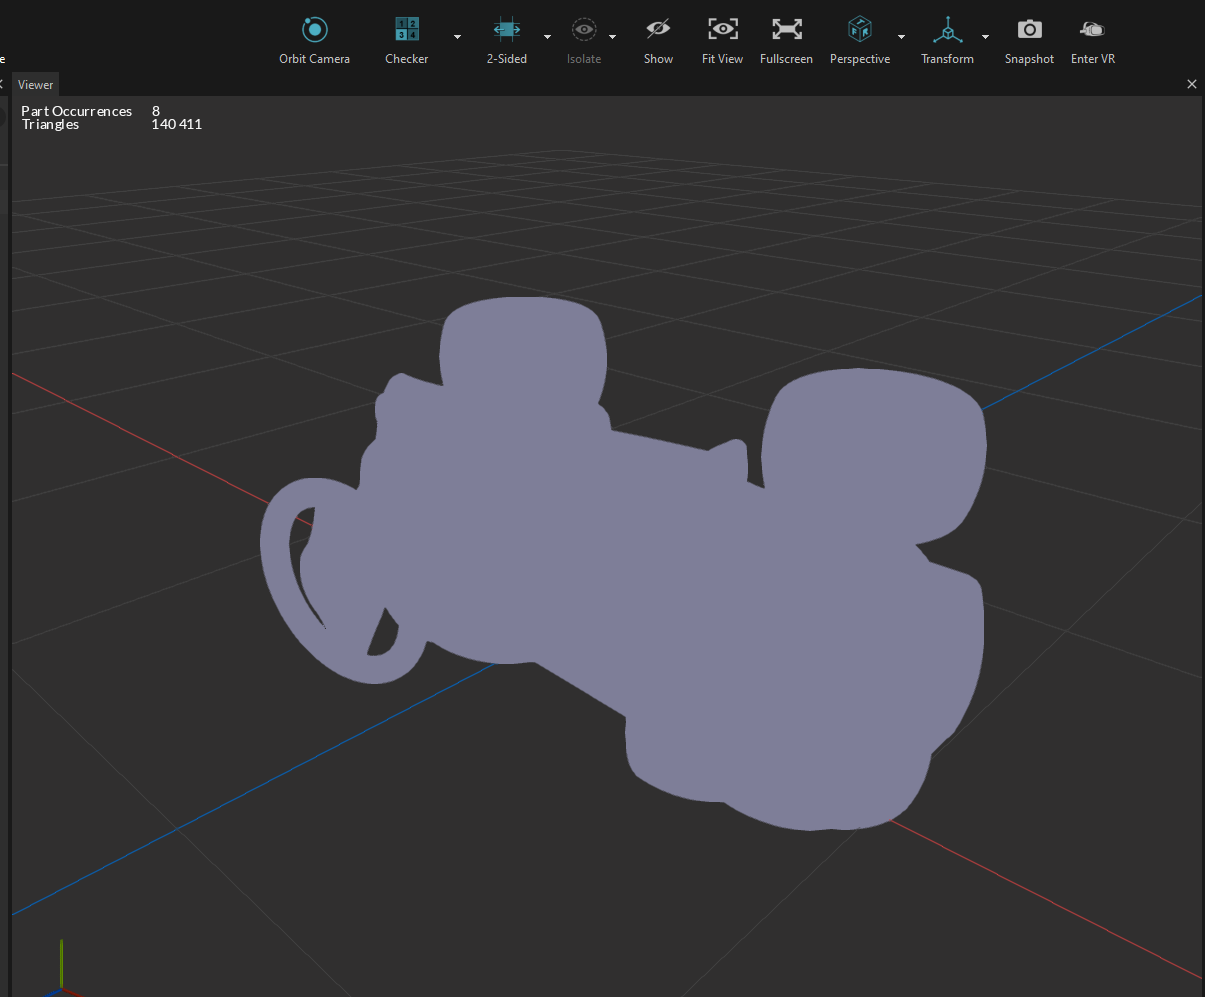
If your occurrence doesn't have texture mapping, when applying materials with textures, the software is going to take the first pixel of your texture and replicate it over all the surface of the occurrence.
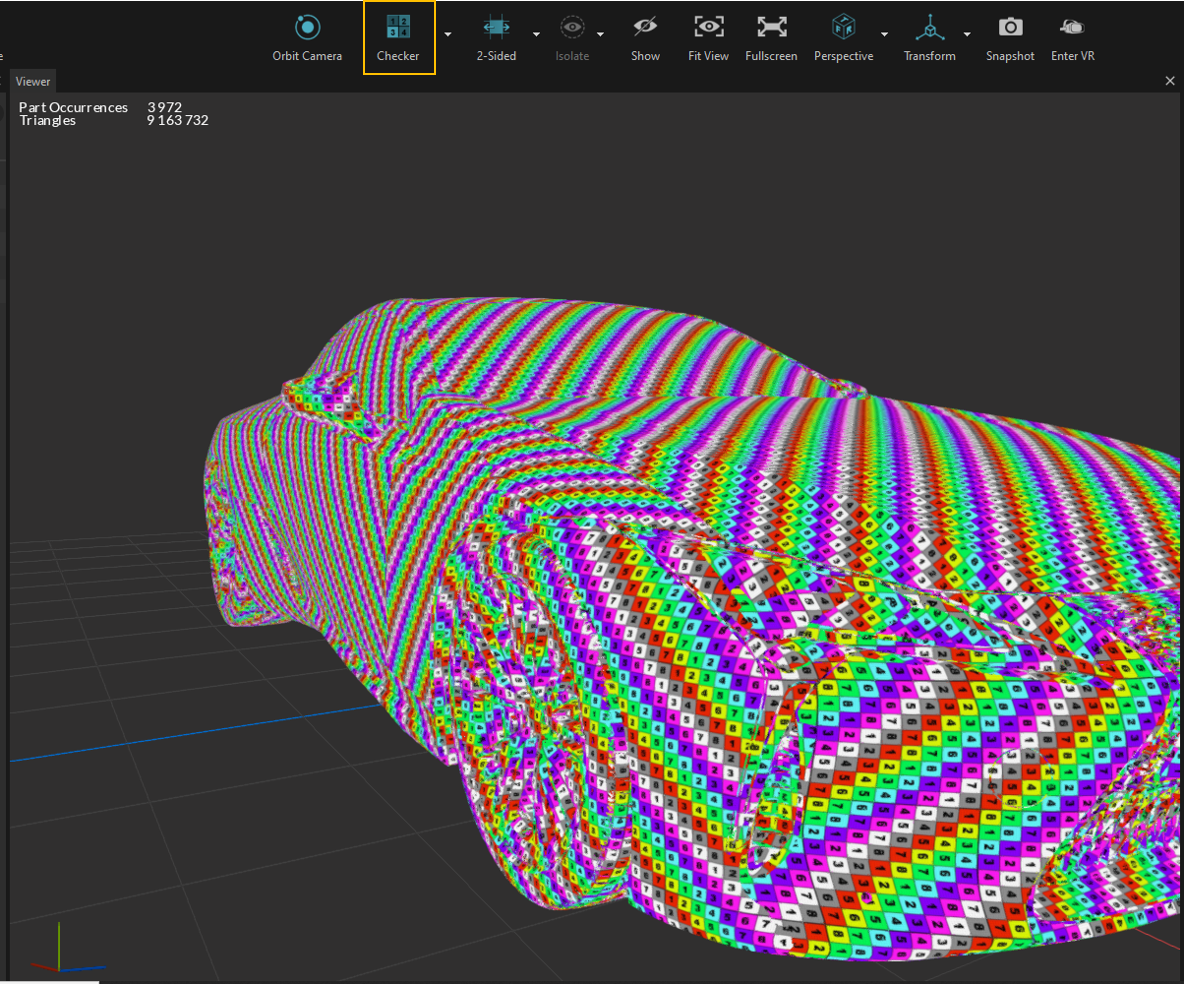
To check if your occurrences present texture mapping, you can use the override material "Checker" which shows the mapping with a numbered and colored checkerboard (left picture). If there isn't any texture mapping, you will see a grayish color on the surface (right picture).
UV Checker example
No UV mapping

Materials & Textures Mapping (UVs) Projection Tool

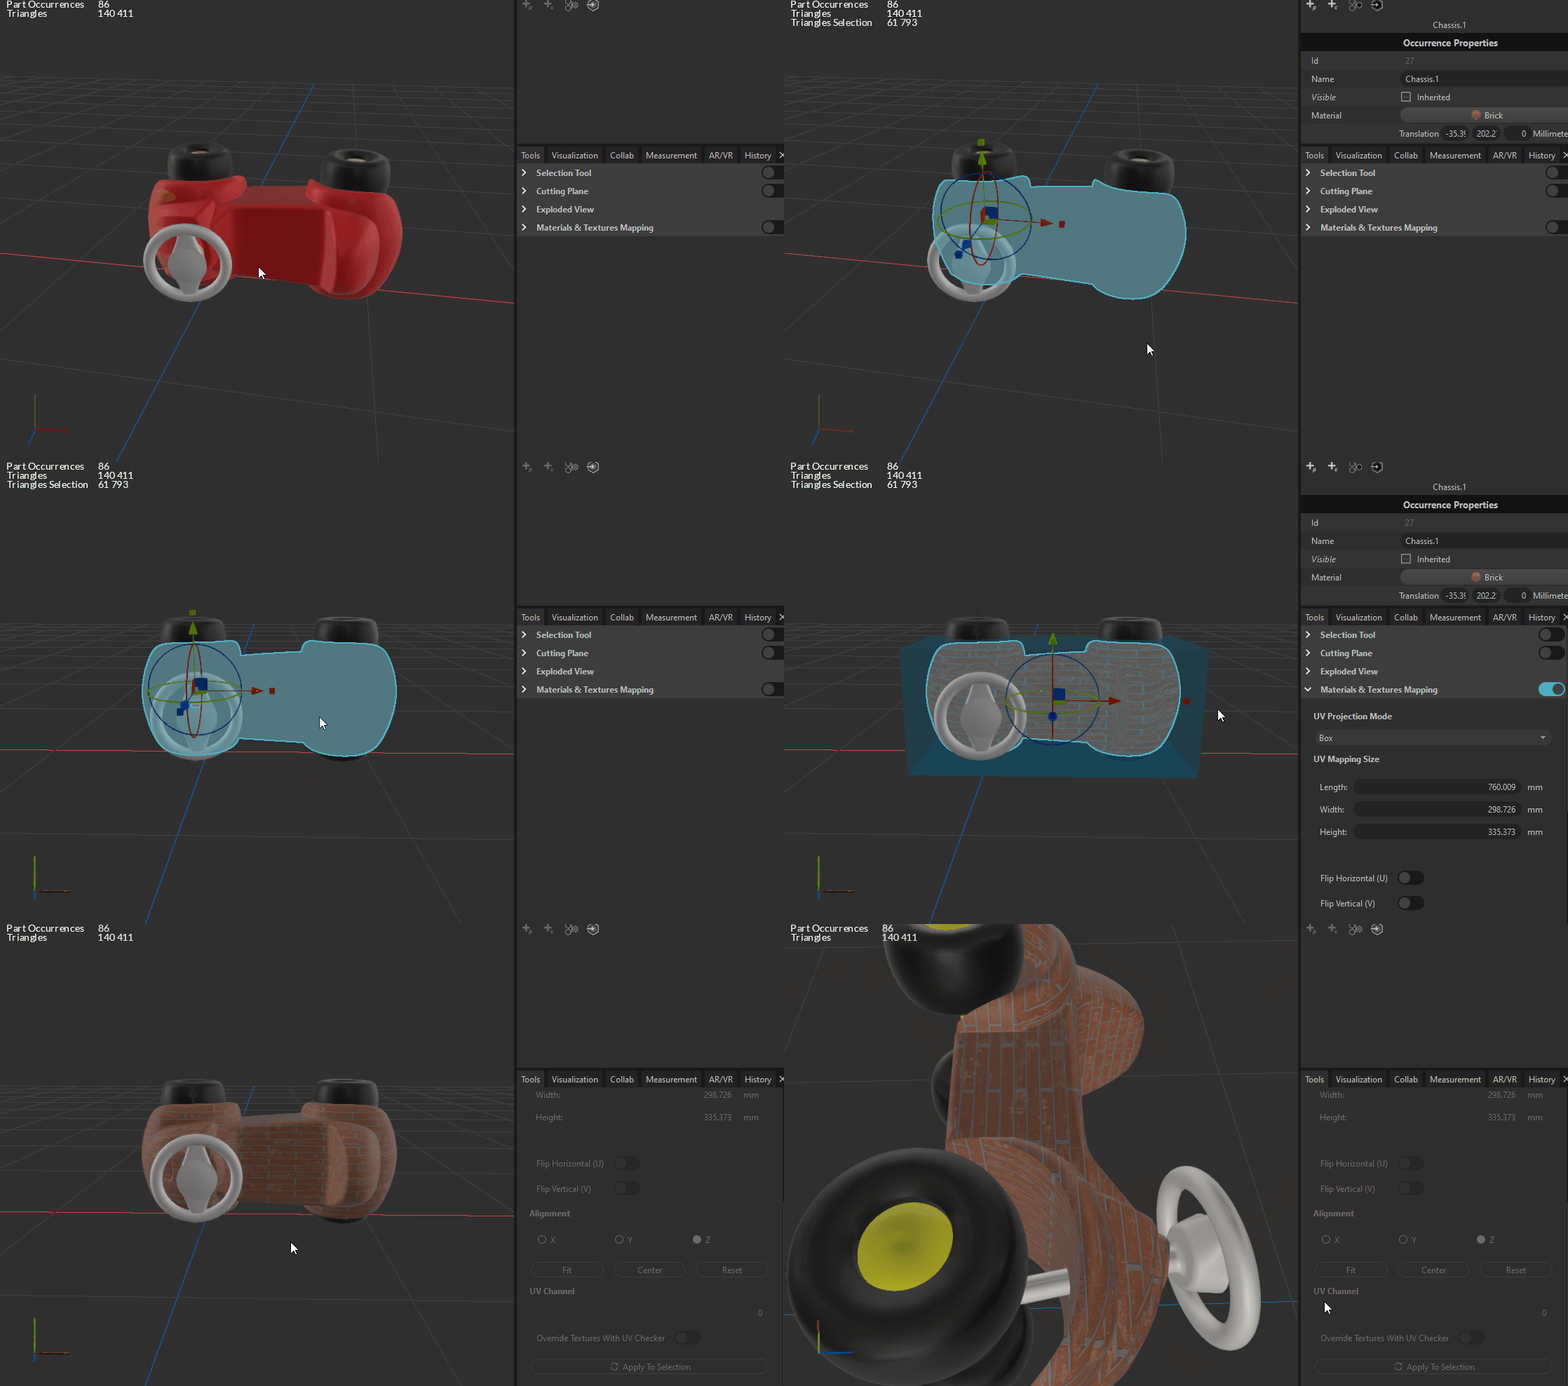
In Asset Transformer Studio, you have the possibility to create texture mapping with our tool.
UV Projection Tool
You need to activate it and to select one or several occurrences to apply a specific projection with a specific dimension. By default, if the materials applied on the occurrence selected is made of textures, the Materials & Textures Mapping tool is going to show you the preview of this material.
Note
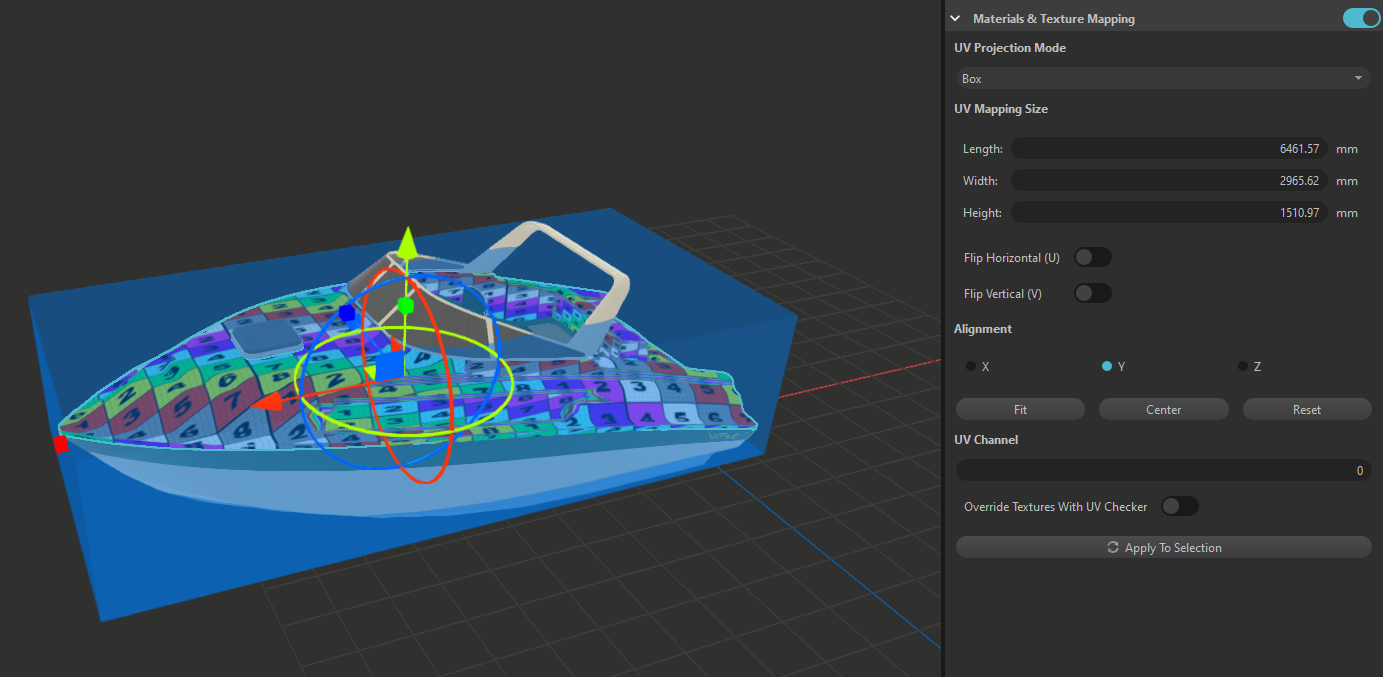
With materials composed of several textures (for instance PBR materials with Normal and Diffuse map), only the first Texture is shown for now. Which means you will still need to Apply To Selection to see the final look.
UV Projection parameters

UV Projection Mode

You can choose between different types of projection to apply texture mapping: Box, Plane, cylinder & sphere. Choose the projection that best suits your occurrence. (for instance, if it's a tube, use a cylinder projection)

UV Mapping Size

By default, when selecting one occurrence, the projection is going to "Fit" it and apply an automatic dimension that suits your occurrence. If you want to adjust these dimensions, you can use the Gizmo handles to size your projection or put real values in "Length, Width & Height" cases.
Note
Using the Fit functionality ensures that the projection is specific for your occurrence. But it's not mandatory. Sometimes, materials need specific UV to get the perfect fit with the occurrence. For instance, our Realistic Materials are the best fit with 400x400x400 projection. The best way is to feel around for the best look and feel.

Flip Horizontal/Vertical

Allow you to flip the texture mapping so your materials will be flipped as well. Useful when you just want to put a single picture (Unlit-texture) as a material on an occurrence.

Alignment

It allows you to reorient the projection according to the axis (X, Y, Z). Useful for cylinders, a bit less for the other projections.

UV Channel

(Advanced feature) UV Channel allows you to have several texture maps on a same 3D object, in order to keep the proportions of the different textures when enlarging the object.

Override Textures With UV Checker

Force to see the checker instead of the Texture's preview.

Copyright © 2026 Unity Technologies
LegalPrivacy PolicyCookiesDocumentation Terms of UseDo Not Sell or Share My Personal InformationYour Privacy Choices (Cookie Settings)

"Unity", Unity logos, and other Unity trademarks are trademarks or registered trademarks of Unity Technologies or its affiliates in the U.S and elsewhere (more info here). Other names or brands are trademarks of their respective owners.

Some pages are machine-translated for convenience, and may contain inaccuracies. In the event of conflicting information, the English version is authoritative.

  • On this page
    • Concept of Materials & Textures Mapping (UVs)

    • Materials & Textures Mapping (UVs) Projection Tool

      • UV Projection Mode

      • UV Mapping Size

      • Flip Horizontal/Vertical

      • Alignment

      • UV Channel

      • Override Textures With UV Checker