Visualization
Using the Visualization panel in Asset Transformer Studio
Read time 3 minutesLast updated a month ago
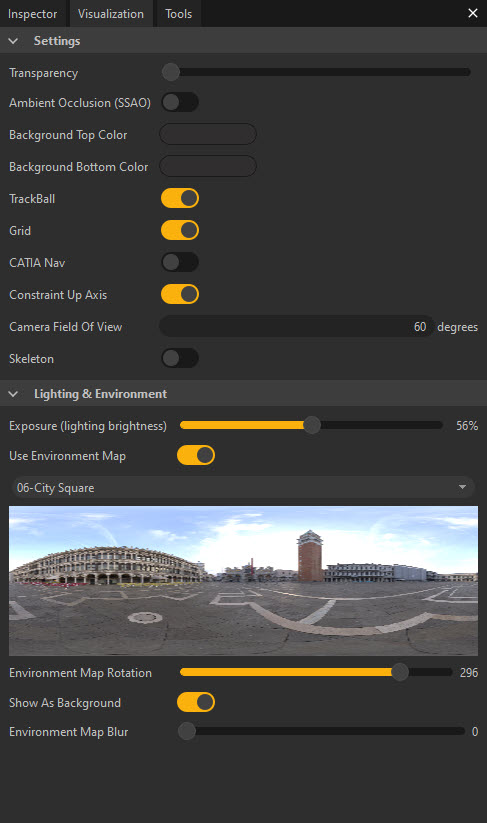
The Visualization panel allows you to control the main parameters defining how objects are displayed and rendered in the Viewer.
It is divided in 2 subpanels: Settings and Lighting & Environment
Settings
Setting | Description |
|---|---|
| Transparency | Used to override the transparency of all the Parts contained in the scene, allowing a see-through (X-Ray) visualization mode |
| Ambient Occlusion (SSAO) | If enabled, it adds a general Ambient Occlusion effect on the Parts of the scene, imitating contact shadows (real-time post-process effect). See also Lighting Modes NOTE: More settings are available for this feature in the Preferences (F9) > Viewer > Effects > SSAO |
| Background Top Color | Defines the color at the top of the Viewport's background (a gradient from the Background Top Color to the Background Bottom Color is applied) |
| Background Bottom Color | Defines the color at the bottom of the Viewport's background (a gradient from the Background Top Color to the Background Bottom Color is applied) |
| Trackball | The trackball is a helper visible in the Viewport that defines the camera rotation point. See also Navigation Controls |
| Grid | The scene grid brings a visual help to evaluate objects orientation and objects scale. By default, the grid size is 2 meters large. |
| CATIA Nav | If enabled, sets the navigation controls as Catia-like navigation mode (mouse only). See also Navigation Controls |
| Constraint Up Axis | If enabled, the Constraint Up Axis parameter keeps the camera from rotating around the up-axis |
| Camera Field Of View | Define the field of view of the virtual camera used in the viewport to visualize the scene |
| Skeleton | If enabled, displays the skeletons of rigged models when existing |
Lighting & Environment
The parameters list in the Lighting & Environment panel defines how the scene and the objects it contains are lit.
Setting | Description |
|---|---|
| Exposure (lighting brightness) | Defines how bright the lighting used to light the scene is set. Depending on the Environment Map chosen in the "Environment Map Selector", the value of this parameter is automatically changed, but can be adjusted manually by the user using this setting |
| Use Environment Map | If enabled, the scene and its objects are lit using the Environment Map (HDR map) defined in the "Environment Map Selector". Otherwise, 4 default lights are used. |
| Environment Map Selector | Allows you to select the Environment Map (HDR texture) used to light the scene if the parameter Use Environment Map is enabled. The user can define a custom Environment Map choosing an HDR texture file. |
| Environment Map Rotation | Used to rotate the HDR texture around the scene's up-axis (Y), in order to adjust the lighting of the scene. TIP: Use the shortcut CTRL + ALT + LMB to quickly rotate the Environment Map, and appreciate how your 3D models react to a change in the lighting |
| Show As Background | If enabled, makes the Environment Map visible in the background of the Viewer (overriding the default gradient background) |
| Environment Map Blur | Defines how blurry the Environment Map is when shown in the background |