Re-Tessellate
How to re-tessellate parts in Asset Transformer Studio
Read time 2 minutesLast updated 9 hours ago
Models that contain BRep surfaces (CAD models) can be re-tessellated directly in the scene without having to import the model all over again. Re-Tessellate allows you to fine-tune tessellation quality of entire models or individual parts in the scene.
See About Tessellation.
Condition
Parts can be re-tessellated providing they were originally tessellated with Asset Transformer Studio, using the Tessellate function, and with the parameter enabled.
Keep BRep ShapeNotes
Here are a few important notes when re-tessellating parts:
- Refining the tessellation parameters values will produce smoother surfaces on your model, but also increase polycount and the scene file size.
- When re-tessellating, meshes are entirely recreated, so actions like mesh repair, face orientation corrections and UVs generation need to be executed again on the newly created mesh. So, it is advised to fine-tune tessellation quality right after import and initial tessellation, prior to moving on to fixing and optimizing meshes.
- When clicking one of the actions, it's the
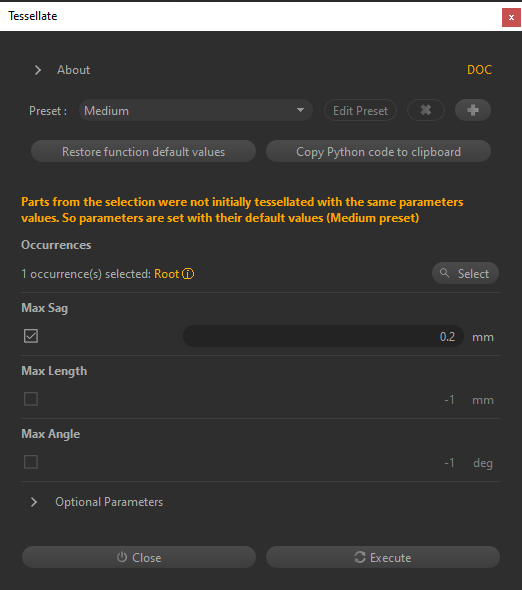
Re-Tessellatedialog box that is opened, and the parameterTessellateis forced.Override Existing Tessellation - In order to help fine-tune tessellation precisely, initial tessellation parameters are stored for each mesh of the scene. When opening the dialog box, parameters values are automatically adjusted to the selection's initial tessellation values, providing the selected parts share the same initial tessellation value. Otherwise, the
Tessellatepreset is automatically set, and a message is raised in the interface, in orange:Medium
How to
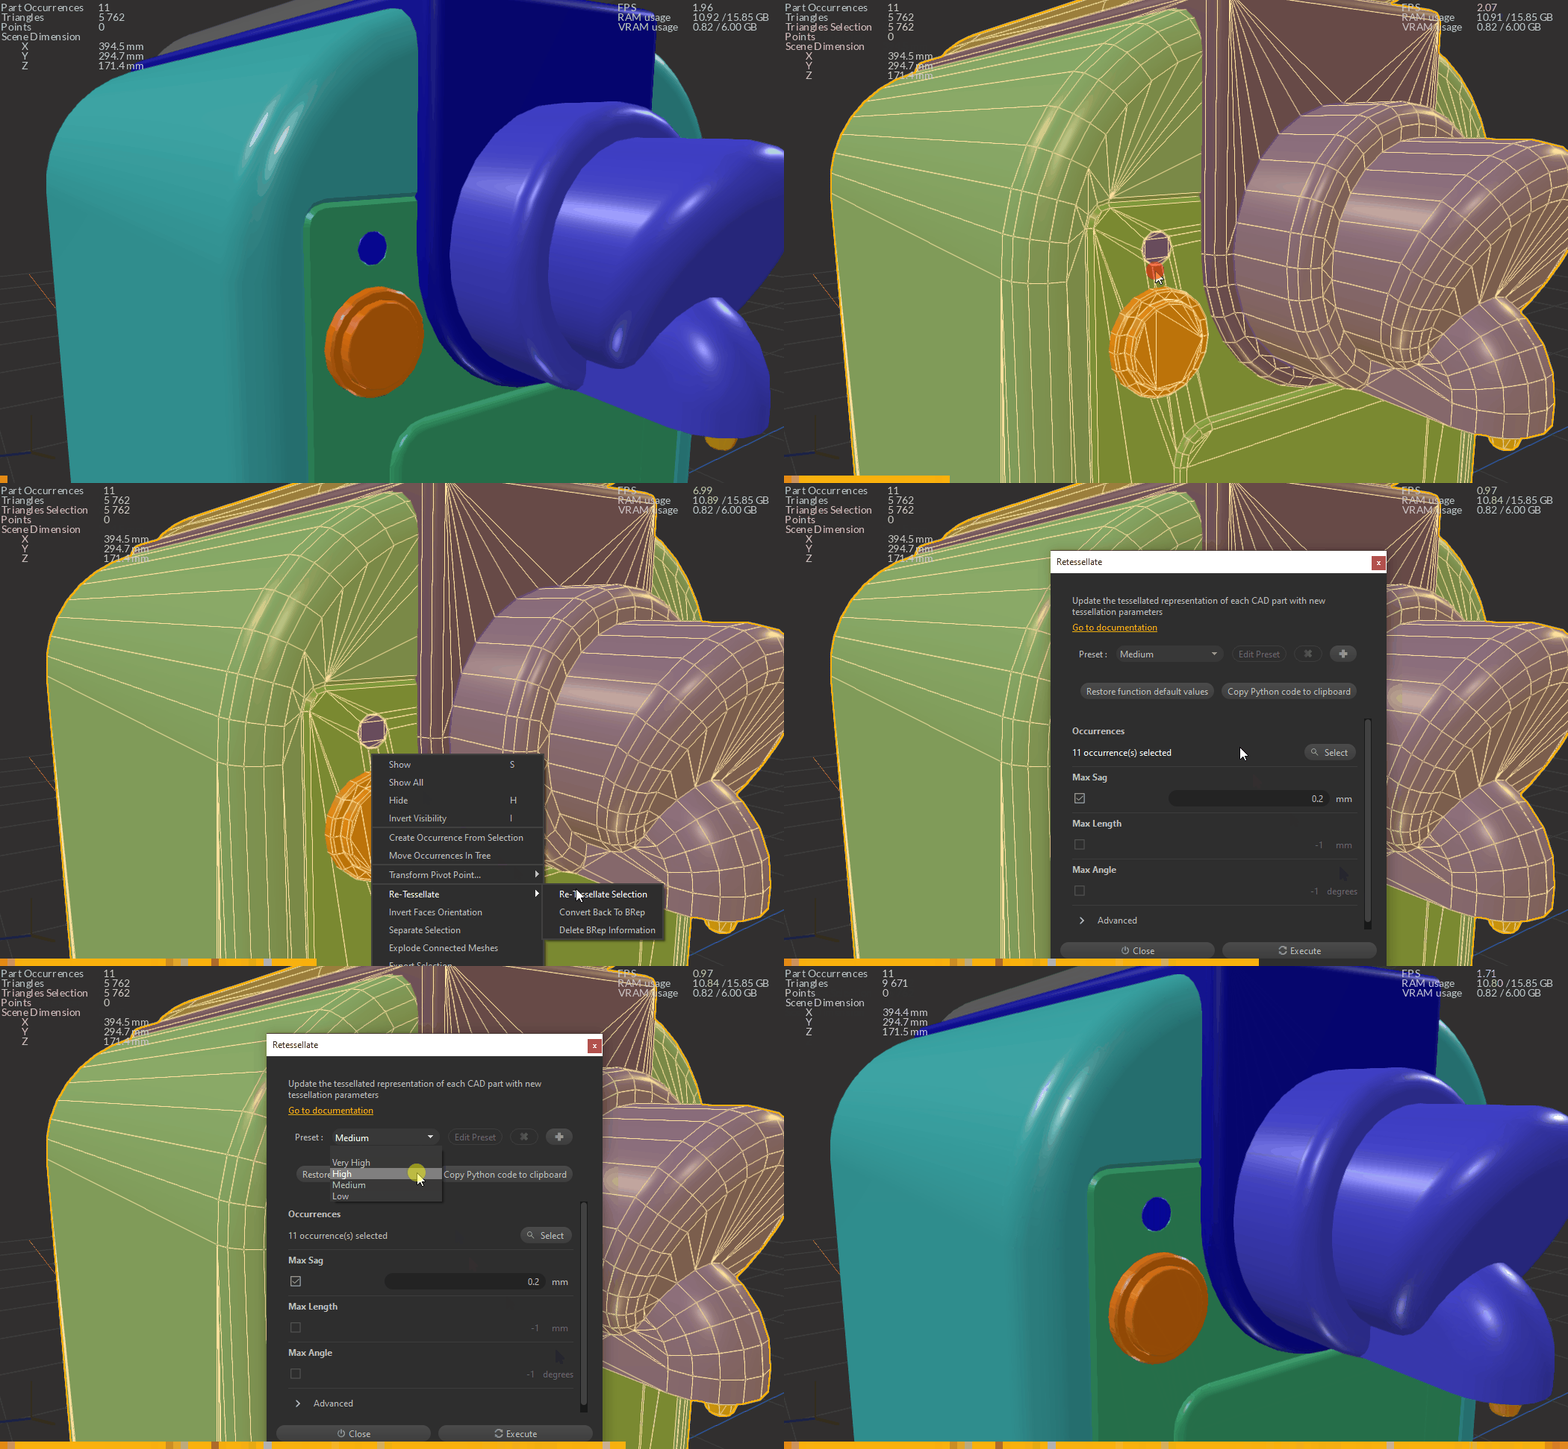
To re-tessellate, follow these steps:
- Select a part, or a selection of parts you wish to re-tessellate using the Viewer or the Product Structure.
- Open the dialog box:
Re-Tessellate- From the CAD menu
- From the Re-Tessellate menu accessible from a right-click in the Viewer
- From the Inspector, using the button in the Part component
Re-Tessellate
- In the dialog box, change the tessellation parameters (see About Tessellation for more information about the parameters).
Tessellate - Click .
Execute
Messages
Pre-process message box
Depending on the nature of the selection, and after clicking one of the actions, a first message box can be displayed before opening the dialog box, asking you how to process parts that were already tessellated:
Re-TessellateTessellate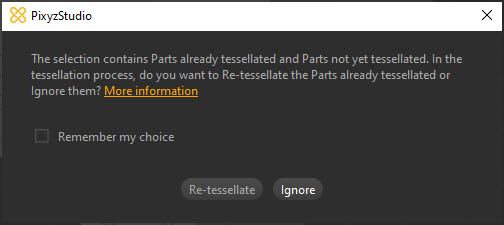
- : All parts of the selection already tessellated before are re-tessellated, and non-tessellated parts are tessellated, with the parameters you define in the
Re-tessellatedialog box.Tessellate - : Parts of the selection that are already tessellated are ignored: only non-tessellated parts are tessellated, with the parameters you define in the
Ignoredialog box.Tessellate
Warnings in the dialog box
Depending on the nature of the selection, a warning message can be displayed in the function dialog box, explaining how/if the selection is affected by the re-tessellation process.