Integrate an existing project using VATs with Unity Authentication
If you already have a Vivox integration that's using VATs for players to join channels and interact with Vivox, you can use this guide to integrate with UAS to access the full suite of services Unity provides.
You will have to make some changes to the player sign-in flow and the VAT creation flow.
Overall, the two flows will work like this:
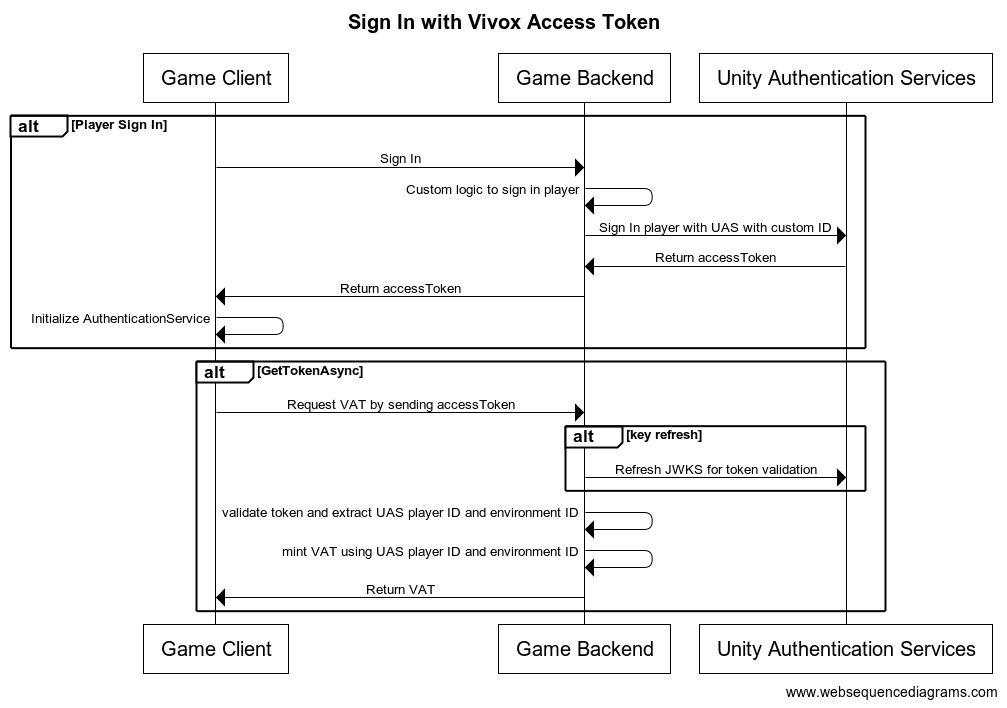
Sign In
- Register all users with the UAS custom ID provider on sign-in and retrieve
accessTokenandsessionTokensfor players. - Set up the AuthenticationService in the client using the
accessTokenandsessionToken
Important: You might not need to use VATs at all. VATs are only needed if you have custom logic in your backend to determine if a player is allowed to access a specific channel.
If this is not the case, you can simply remove the VAT generation flow and let the Unity Authentication SDK handle it.
Simply use the default initialization for Vivox: await VivoxService.Instance.InitializeAsync(); and skip the Creating VATs step.
Creating VATs
- The Vivox SDK will request a VAT from the backend whenever one is needed using a custom token provider implementation.
- Add the
accessTokento the request to the backend when requesting VATs within theGetTokenAsyncmethod. - Validate and extract the needed information from the token in the backend and create the Vivox Access Token to send it back to the client.
Steps
Follow these tutorials to update your sign-in and VAT creation flows.
1. Update sign-In flow
To set up the custom ID sign-in, follow the steps in Sign-in with Custom IDs.
2. Update VAT creation flow
To adapt your VAT creation flow to integrate with UAS, follow the steps in Using Vivox Access Tokens together with UAS.
With all of this done, you are now ready to use any of the Unity Gaming Services, including the Vivox Moderation Platform.