Unity Version Control plugin for Intellij IDEs
Requirements
- Unity Version Control installation version 11.0.16.X or above.
- JetBrains IDE version 2022.3 or above.
How to install?
The installation process below is a summary of the required steps to install a custom plugin in your IDE manually.
- Open your preferred JetBrains IDE.
- Go to the "Plugins" panel and uninstall any version of the plugin "Plastic SCM Integration". Restart if asked.
- Use the option "Install Plugin from Disk..." (gear icon) at the top, and select the plugin zip file from the Unity Verion Control installation folder
${INSTALL_DIR}/client/plugins/intellij/plastic4intellij-X.Y.Z.zip.

- Open a .NET project under Unity Version Control.
- Make sure the PlasticSCM plugin is enabled under Settings -> Version Control -> PlasticSCM.

More info: JetBrains documentation
Using the plugin
Users can find the set of Version Control features under the contextual menu of the project hierarchy.
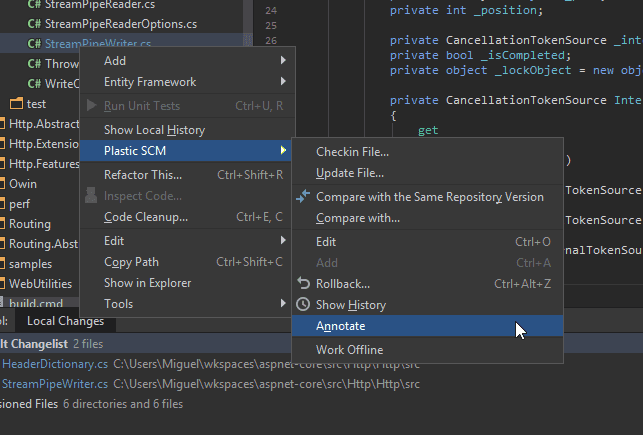
In addition, there is a dedicated pane "Plastic SCM" to cover all things related to Version Control: local changes pending to checkin, history and revisions, unversioned and ignored files, etc.

One of Unity Version Control's main features, semantic diffing (understanding code structure to reduce integration conflicts), is embedded in the IDE interface.

And you can annotate lines and history of the local files to better understand the evolution of the project.
