Continuous UVs from CAD Models
How to generate continuous UVs from CAD models in Asset Transformer Studio
Read time 4 minutesLast updated 9 hours ago
Asset Transformer Studio gives the possibility to generate UVs based on the CAD data, which can then be made continuous for repeatable textures, or repacked for lightmaps.
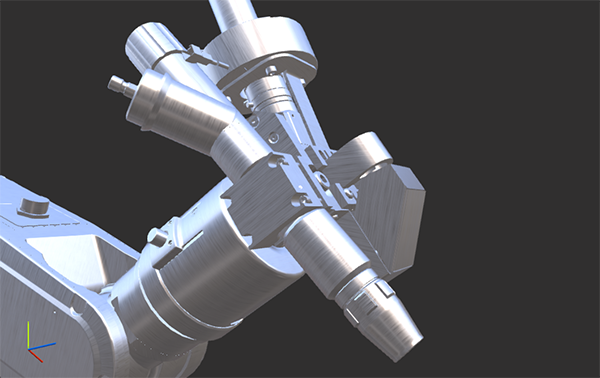
Here is an example of a brushed aluminum material applied on a model for which continuous UVs were created using this method:
How To
UVs from CAD can be generated at the tessellation phase, based on the BRep/NURBS surfaces contained in a CAD model. They are called "Conformal Scaled UVs".
Here is how to setup the parameter in the Tessellate function:
UV Mode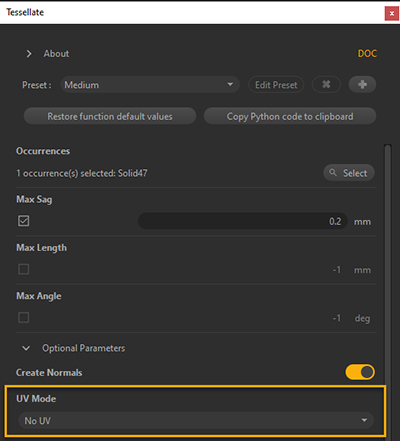
The algorithm creates one UV island per CAD patch, unstretched, with a correct 2D scale relative to its 3D size. A small patch will have a smaller 2D size (in the UV space) than a big patch of the same part, resulting in a homogeneously scaled set of UVs.
Here is an example with the CAD model of a soldering gun:
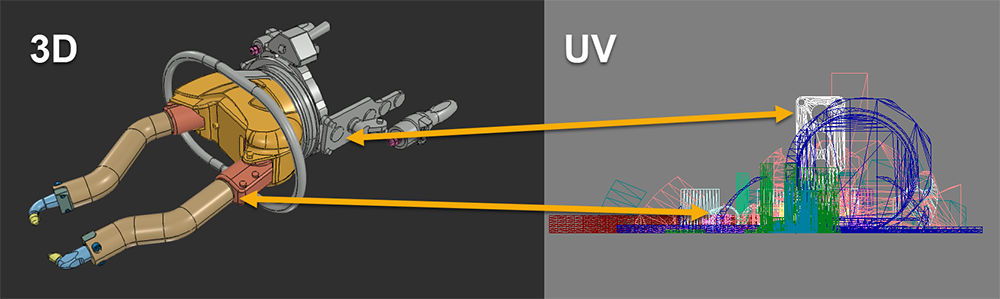
As is, these CAD UVs are not really suitable for repeatable textures, nor for lightmaps — they are disconnected, too large, etc. — but they are a usable starting point.
See the paragraphs below to see how the UVs can be used both for repeatable textures and lightmaps.
UVs for repeatable textures
UVs obtained at tessellation with the Conformal Scaled UV method are not directly usable for repeatable textures, as they are not connected to each other, nor continuous, as we can see with a Wood texture applied to the model:
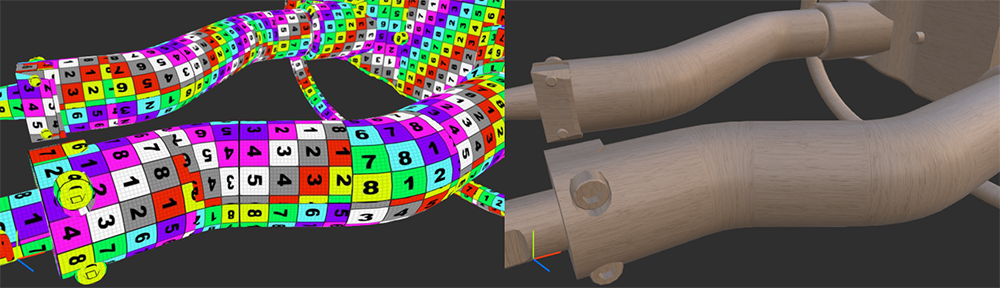
To make the patches continuous, use the function algo.mergeUVIslands(), which minimizes the number of seams in the UV mapping.
After running this function, UV islands are now continuous, allowing the texture to repeat properly:
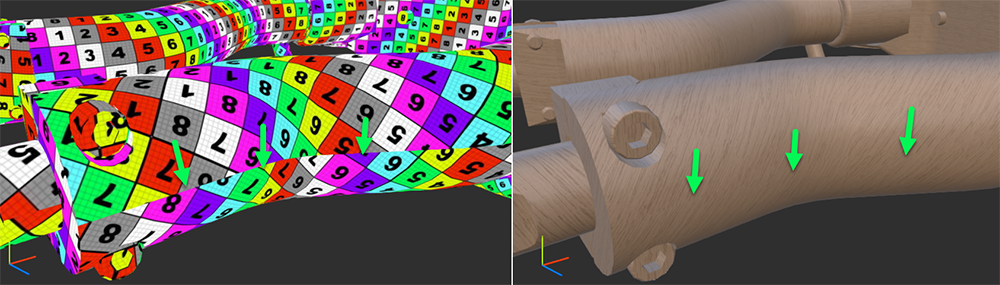
The remaining issue is the seam position (green arrows): it is quite visible on the arm of the soldering gun, because it's placed at the exterior.
If we were to manually unwrap this model, we would place the seam in the interior of the arm, where it is less visible.
There is a method to do that automatically as well.
Using the function algo.createVisibilityInformation() before merging UV islands together, Asset Transformer Studio can find which polygons are less visible in the model, in order to find a better place to cut seams.
The polygons that are less visible from cameras placed around the model are automatically marked as candidates for seams (their edges/boundaries), using visibility attributes.
These visibility attributes are transferred as weights to the function algo.mergeUVIslands() using another function: algo.transferVisibilityToPolygonalWeight().
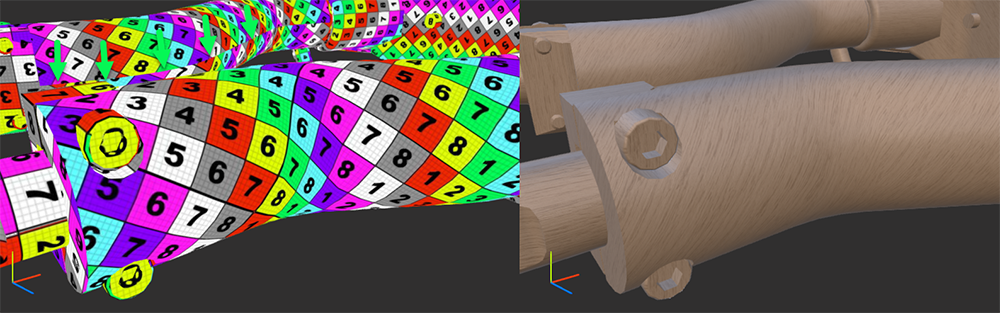
Using these visibility attributes as a helper to find the best seam possible, the UV islands merging gives a much better result, with a seam placed in the interior of the arm, where it is the least visible:
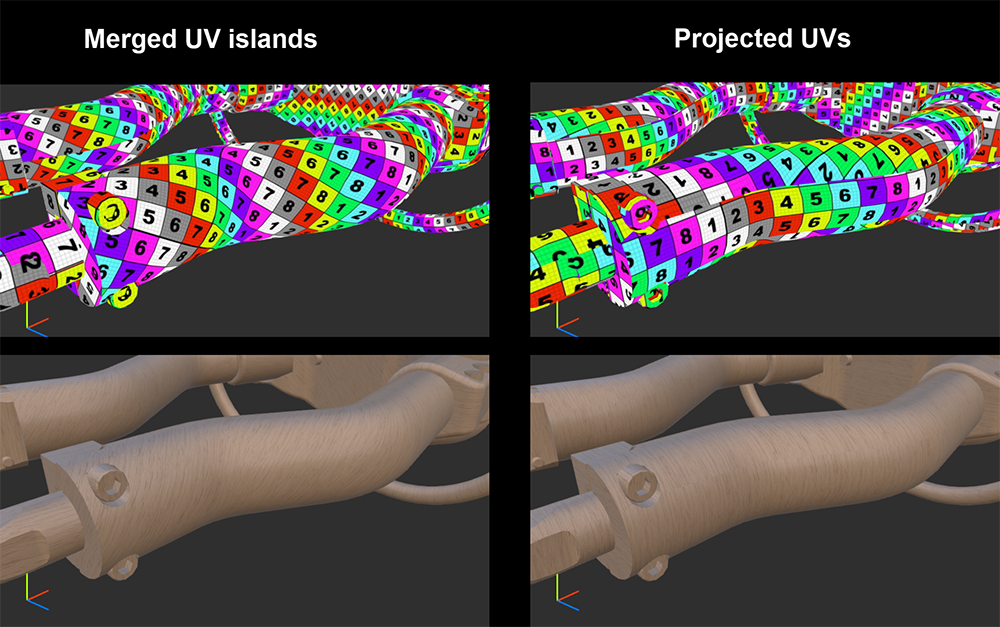
Comparing the result of the UV obtained by merging the Conformal Scaled UVs against UVs obtained by a simple projection, we can see the benefits of the first method: textures are continuous with no visible seams, and unstretched!
Asset Transformer Studio is shipped with a Sample Script called GenerateUVsFromCADModel.py, allowing to obtain the result above.
You can also use the following code:
root = scene.getRoot()algo.repairCAD([root], 0.1)algo.tessellate([root], 0.2, -1, -1, True, algo.UVGenerationMode.ConformalScaledUV, 0)algo.createVisibilityInformation([root], 2, 1024, 16, 90, True)algo.transferVisibilityToPolygonalWeight([root], 2)algo.mergeUVIslandsAffine([root], 0, 0, 1.2, -1, 1, -1, 0, False, 90)algo.resizeUVsToTextureSize([1], 100, 0)
UVs for lightmaps
UVs obtained at tessellation with the Conformal Scaled UV method are not directly suitable for lightmaps, as they are overlapping and not repacked in the [0,1] UV space, making lightmap baking impossible.
But UV islands generated are great as they are properly scaled and unstretched. So, they only need a basic repacking to be ready for baking.
The example below shows perfectly repacked UVs:
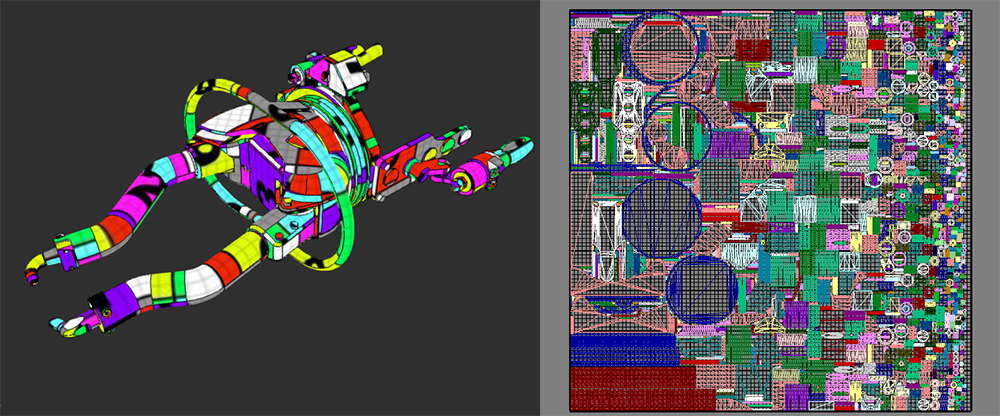
Here is the code used to obtain the result above: it copies the UVs generated at tessellation for the first channel (0) into the secondary channel, which gets repacked (all parts are repacked in the same UV space in this example):
root = scene.getRoot()algo.repairCAD([root], 0.1)algo.tessellate([root], 0.2, -1, -1, True, 2, 0)algo.copyUV([root], 0, 1)algo.repackUV([root], 1, True, 1024, 2, False, 3, True)