Push Notifications SDK
Register for Push Notifications and configure the SDK for your platform.
Read time 5 minutesLast updated 2 months ago
Use the Push Notifications SDK to send push notification campaigns, including rich push notifications with images to your users.
Platform support
This SDK supports both iOS and Android. iOS 10+ and Android SDK >= 26 (Oreo) are supported.Quick start
The SDK comes with a sample script that will register for push notifications. Add this to your project and set the relevant settings in the editor under Project Settings.Registering for Push Notifications
To register for Push Notifications, three steps are required.- Populate settings in the editor. These can be found in Project Settings > Services > Push Notifications.
- Initialize Unity Services, so the required analytics events can be sent to Unity Analytics. You also need to implement the privacy flow for the required events to be sent correctly.
- Register for notifications in the startup code for your game, to ensure no notifications are missed. However, on first registration, a user is shown a permission request so ensure this call is made at a convenient place in your game. The SDK will handle the showing of notification content, including images, titles, and message body.
Code sample:
using Unity.Services.Analytics;using Unity.Services.Core;using Unity.Services.PushNotifications;...await UnityServices.InitializeAsync();bool userGaveConsent = ...;if (userGaveConsent){ AnalyticsService.Instance.StartDataCollection();}try{ PushNotificationsService.Instance.OnRemoteNotificationReceived += notificationData => { Debug.Log("Received a notification!"); }; string pushToken = await PushNotificationsService.Instance.RegisterForPushNotificationsAsync();}catch (Exception e){ Debug.Log("Failed to retrieve a push notification token.");}
Notification Received callbacks
You can register a delegate to receive a C# event callback when a notification is received, to perform custom behavior at that point. To do this, add a delegate/method callback toPushNotifications.OnNotificationReceivedPush Notifications settings
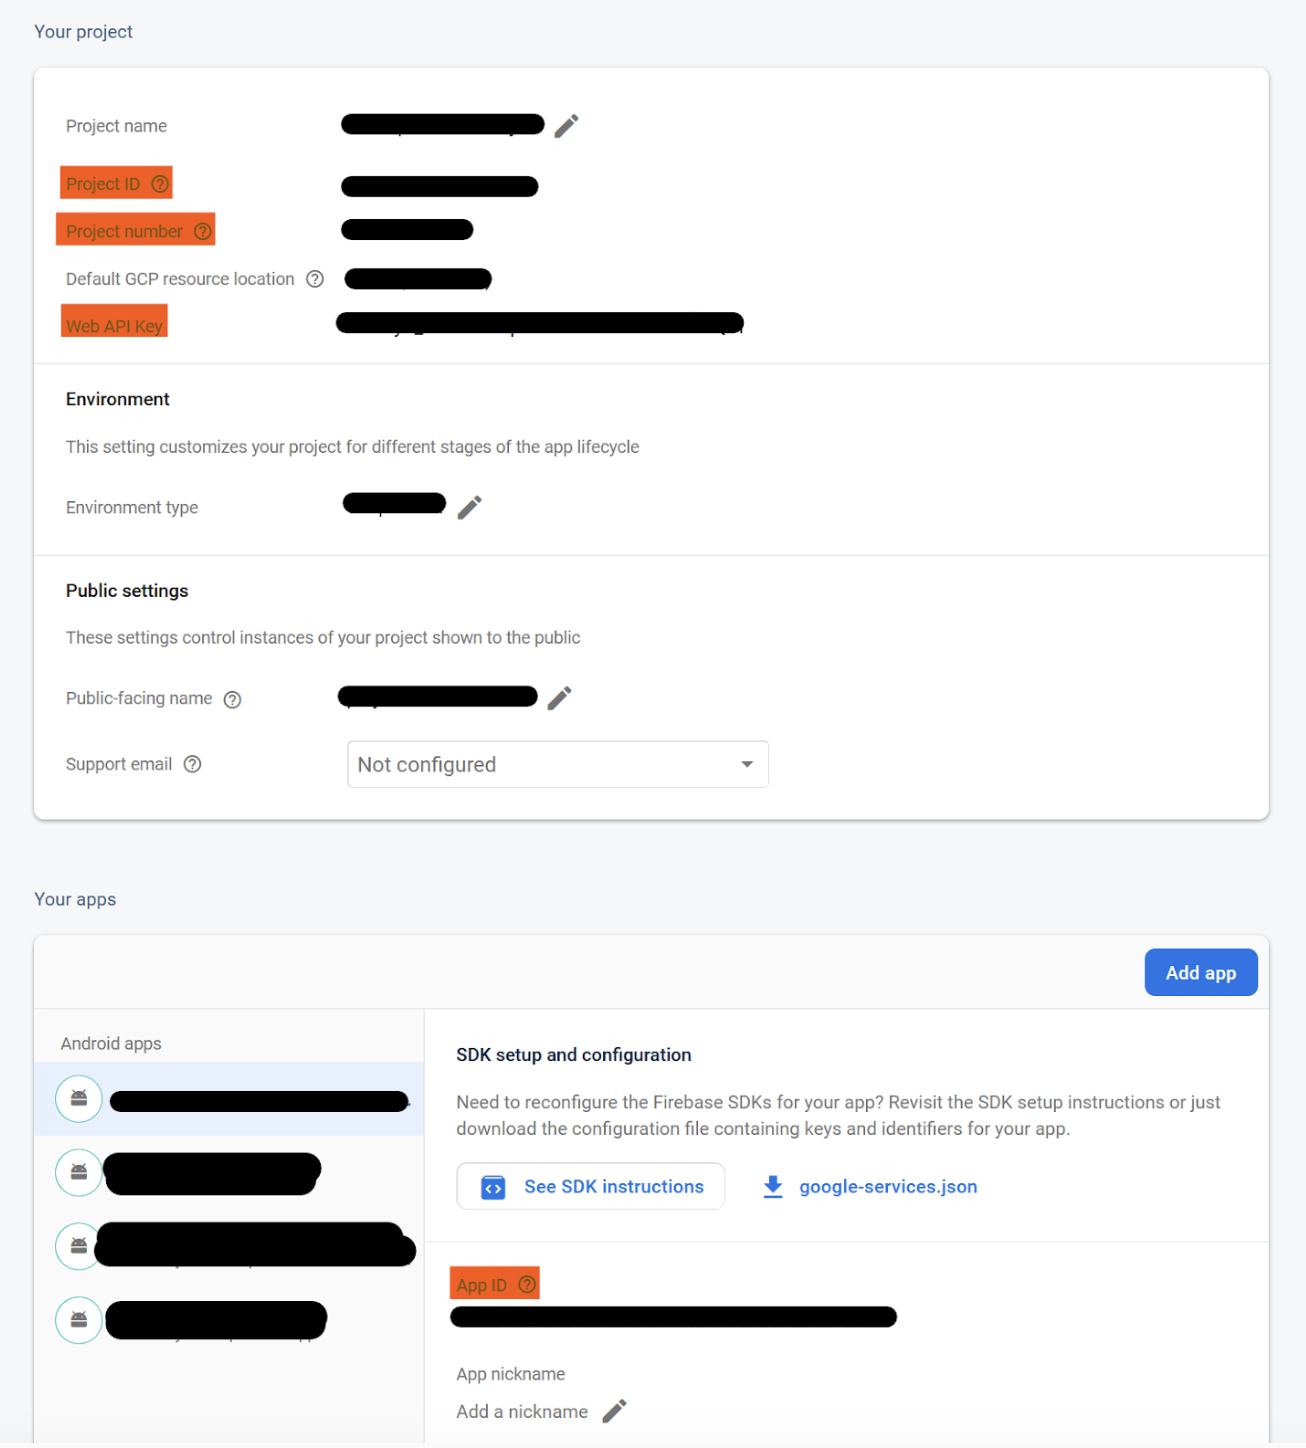
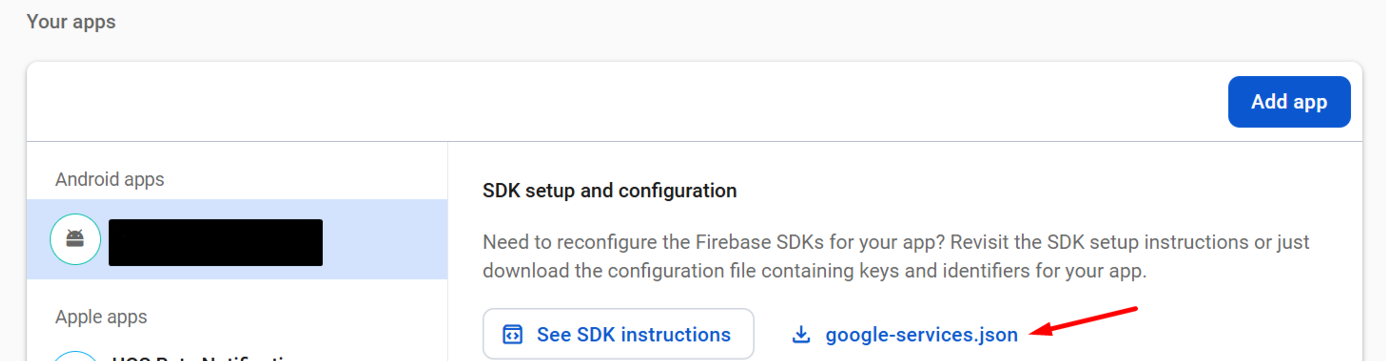
The SDK requires a number of settings to function correctly. Some settings are only used on a certain platform, indicated in the setting name. The following Android (Firebase) settings can be set: You can find these settings in the Unity Editor > Edit > Project Settings > Services > Push Notifications. The values for all the fields below is found in the Settings page of your Firebase dashboard.- FirebaseWebApiKey: The Web API Key for a Firebase project to be used for Android's Firebase Cloud Messaging API. If this isn't shown for your project, you might need to enable Firebase Authentication prior.
- FirebaseProjectNumber: The Project Number to be used for Android's Firebase Cloud Messaging.
- FirebaseAppID: The App ID for a Firebase application to be used for Android's Firebase Cloud Messaging API.
- FirebaseProjectID: The Project ID for a Firebase project to be used for Android's Firebase Cloud Messaging API.
Analytics
The SDK records two Analytics events:- notificationServices: This event is recorded whenever a new token is registered on the client. It contains the push token and is used to register this token with the backend service, to send notifications from the Unity Dashboard, and is required for proper functionality of this product.
- notificationOpened: This event is recorded whenever a notification is opened by a user. It contains data regarding which campaign and cohort the user was in, and whether the app was launched from the notification.
Analytics-only mode
It's possible to integrate the SDK with an existing push notification service if required. To do so, do not call the registration methods as indicated above, and instead use the two methods in
PushNotificationsService.Instance.AnalyticsRecordPushTokenUpdatedPushNotificationsService.Instance.Analytics.RecordPushTokenUpdated(token);RecordNotificationOpenedPushNotificationsService.Instance.Analytics.RecordNotificationOpened(notificationData);Testing the SDK integration
You can test the Push Notifications SDKs integration by following these steps within your app.- Within your app, fetch the PushNotificationsService token and write it to the log using `Debug.Log`.
- Follow the debugging guide for Android or the Build and Run guide for IOS, depending on your target platform, to run your app.
-
Read the app logs to fetch the logged token.
- For Android: Use the Android Logcat package.
- For IOS: Check the logs inside XCODE when running the app.
- Within the Unity Dashboard, go to an existing Push Notification Campaign or create a test one.
- Inside the Content step, create your notification if necessary and select Test on Device.
- Select the target device and input the fetched token.
- Select Send and verify if the device receives the notification.
External Dependency Manager for Unity (EDM4U) support
Other SDKs or Unity Packages, including Google’s Firebase unity packages, use the External Dependency Manager for Unity (EDM4U)
or Mobile Dependency Resolver (MDR) to resolve their dependencies inside the Unity Project.
The Push Notifications SDK does not require the use of EDM4U or MDR to resolve its dependencies within the Unity project, nor does it redistribute or use EDM4U or MDR by default.
However, starting from version
3.0.1-pre.1Assets/Push Notifications/Editor/AndroidResolveForce ResolveDisplay Libraries
Note that the comment might be different if other packages also require the same dependency. If this is the case, EDM4U will list in the adjacent comment all files from where the dependency was extracted. So long as the dependency file path (implementation 'com.google.firebase:firebase-messaging-ktx:22.0.0' // Assets/Push Notifications/Editor/Android/PushSDKDependencies.xml:9
Assets/Push Notifications/Editor/Android/PushSDKDependencies.xml:9Assets/Push Notifications/Editor/AndroidForce Resolve