Unity Ads Report
The Unity Ads Report provides an organization-level view of how much you are earning from your monetizaton strategies and the factors that affect those earnings. All Unity-mediated projects for an organization are included in this report.
Use this report to track and analyze your performance, and use report observations to drive decision-making so you can maximize your earnings.
To access this report, on the Unity Ads Monetization dashboard, select Reporting > Unity Ads Report.
Filters
The Unity Ads Report provides a default report on the mediation performance of your app for the iOS and Android platforms over the previous 7 days.
You can also focus on specific information and trends by selecting one or more data filters to apply to your report.

Combine different filters to define and isolate the data that you want to review.
- Date - Select predefined dates (for example, Last 3 days, Last 7 days, Last 14 days, or Last 31 days) or choose a custom date range. The default selection is Last 7 days.
- Projects - Select the Unity-mediated projects in your organization to provide reporting results for.
- Platform - Select Android, iOS, or both platforms.
- Ad Formats - Select the Banner, Interstitial, or Rewarded ad types.
- Countries - Select one, multiple, or all countries applicable to your app.
Analyze your reports
Analyzing both the reporting graph and table can help to guide the actions that you need to take to adjust and improve the mediation performance for your organization.
Graph
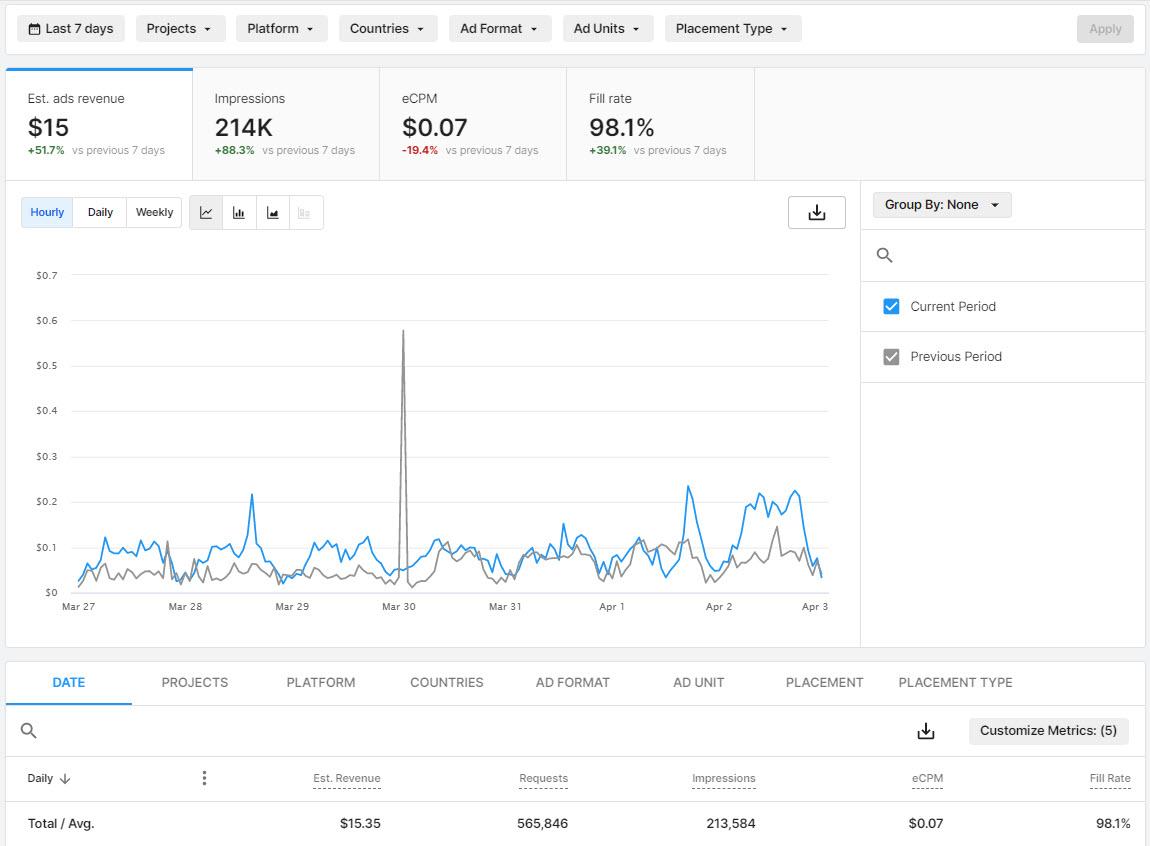
The graph shows the total revenue of all Unity-mediated projects in your organization by default between the current week (indicated by the blue trendline) and the previous week (indicated by the gray trendline), and a visualization of the following metrics:
- Revenue - The total collected revenue to date.
- Impressions - The number of times an ad was displayed in your app.
- eCPM - The average revenue gain per 1,000 impressions.
- Fill rate - How often the waterfall is able to fulfill an ad request.
- Hourly breakdown - Breaks reports into hourly data points.
Note: Hourly breakdown is only available when the date range is seven days or less.
- Weekly breakdown - Breaks reports into weekly data points.
Note: Weekly breakdown is only available when the selected date range is seven days or more.
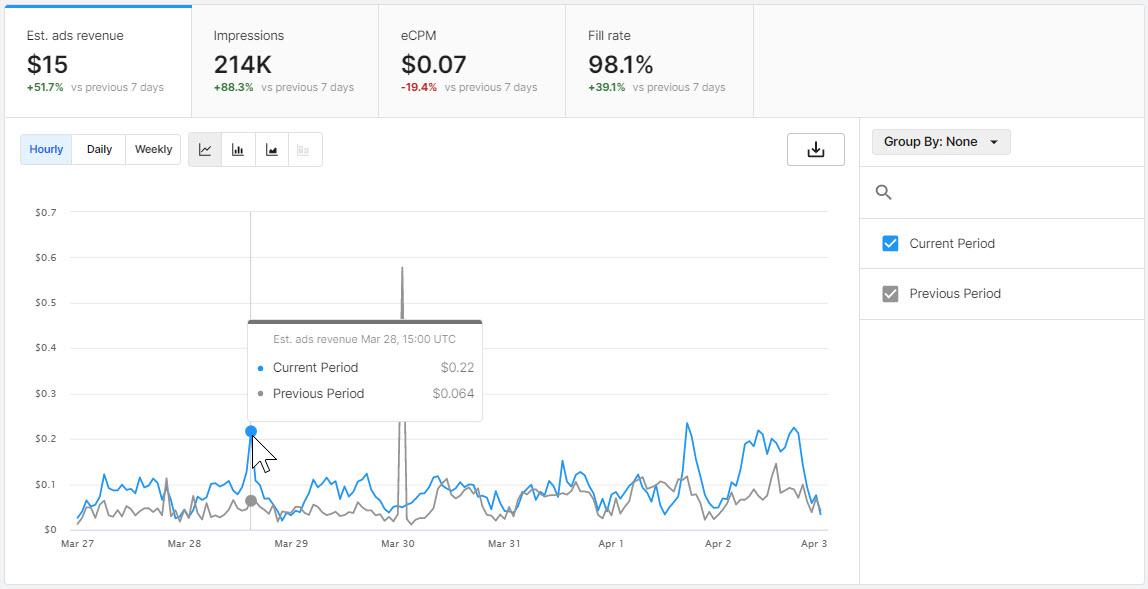
Select a tab to review details on a specific metric and examine trend lines. Hover your cursor over a trendline to review a metric for a specific time. Each tab also indicates an average increase or decrease over the selected time period.
By default, the graph displays the performance for the time period you select and the same time period for the previous week to provide a week-by-week visual analysis.
Table
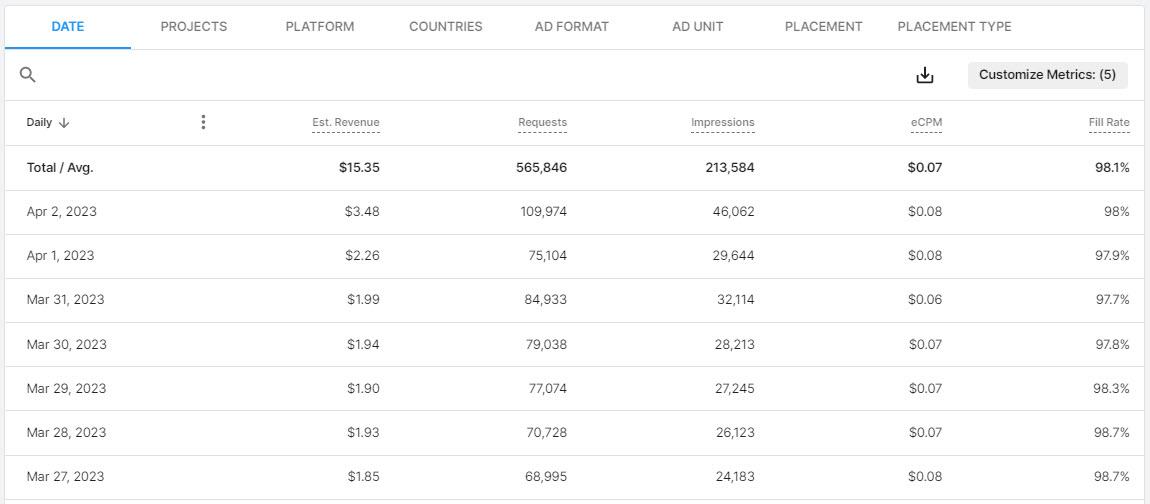
The table provides a breakdown of your waterfalls by date, project, platform, country, and ad unit, which you can further sort to view the following data:
- Revenue - The total collected revenue to date.
- Requests - The total number of times your project makes an ad request to ad networks.
- Impressions - The number of times an ad was displayed in your app.
- eCPM - The average revenue gain per 1,000 impressions.
- Fill Rate - How often the waterfall is able to fulfill an ad request.
- Hourly breakdown - Breaks reports into hourly data points.
Note: Hourly breakdown is only available when the date range is seven days or less.
- Weekly breakdown - Breaks reports into weekly data points.
Note: Weekly breakdown is only available when the selected date range is seven days or more.
Save and edit reports
Save report filters and group-bys, delete and rename reports, set default reports by user, and share reports with a URL.
To save a report:
- On the Unity Ads Report page, choose one or more filters to apply to your report.
- Select Apply.
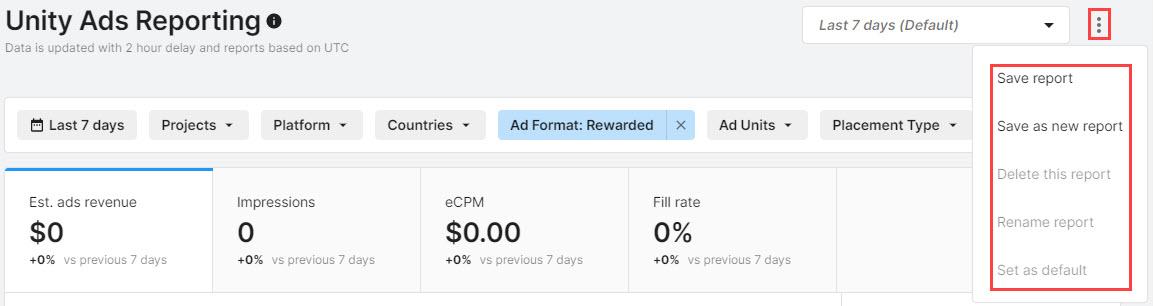
- Select the more menu
 .
. - Select Save report.
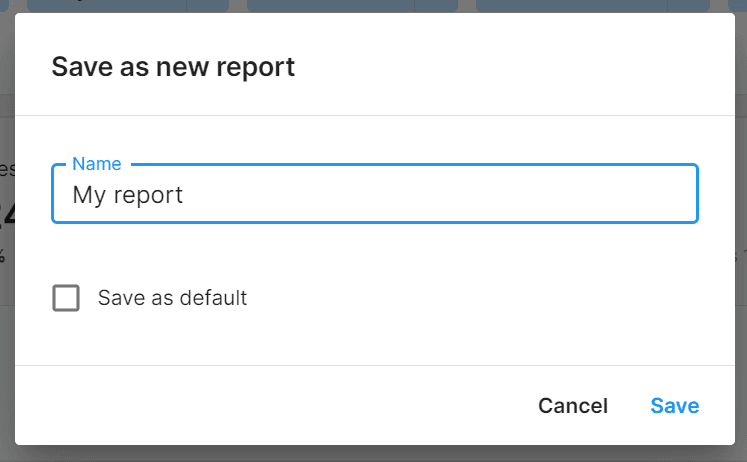
Note: You can also save, or create, a new report and set it as the default, as shown in the following image.
To delete and rename a report:
- Select the report menu next to Export Report and choose the report you want to delete or rename.
- Select the more menu .
- Select Delete this report or Rename report.