Documentation

​
​

Development

User Acquisition

Monetization

Industry

Asset Transformer SDK

2026.1

Supported
​

User Manual

Python API

C# API

Changelog

Discussions

Asset Transformer SDK

2026.1

Supported
​

​
​
Get started
  • System requirements
  • Licensing
  • Setup
  • Migrate from Scenario Processor
Framework
  • Framework
  • Preferences
Input/output files
  • Supported formats
  • Import files
    • Import Autodesk Alias files
    • Import Autodesk VRED files
    • Import RVM files
    • Import Autodesk ReCap files
  • Export files
  • Export textures
  • CAD vs Mesh
Scene
  • Product structure
  • Occurrence
  • Component
  • Material
  • Image
Algorithms
  • CAD
  • Healing
  • Optimization
  • Combine and bake
  • Reconstruction
  • UVs
Viewer
  • Viewer
Pixyz UI
  • Setup
  • Overview
  • Create a custom UI
Guidelines
  • Data preparation
  • Process point clouds
Debug and diagnose
  • Log files
  • Debug best practices
Other
  • Samples
  • Glossary
  1. Asset Transformer SDK (ex Pixyz)

Importing RVM Files

Learn how to import RVM files in Pixyz, handle metadata, and optimize large 3D assets for conversion to other formats.
Read time 1 minute
Last updated 9 months ago

RVM is a 3D format broadly used to exchange data in the energy, oil, and gas industries. For example, it is used as a bridge between Aveva PDMS and Autodesk Navisworks.
RVM files are usually very large assets with hundreds of thousand parts which can be very demanding for your hardware.
RVM files imported in Pixyz can then be optimized using all available features before being converted/exported into a more commonly used format (FBX, glTF, USD…).
Note
Read this article to learn more about the RVM format.

How To

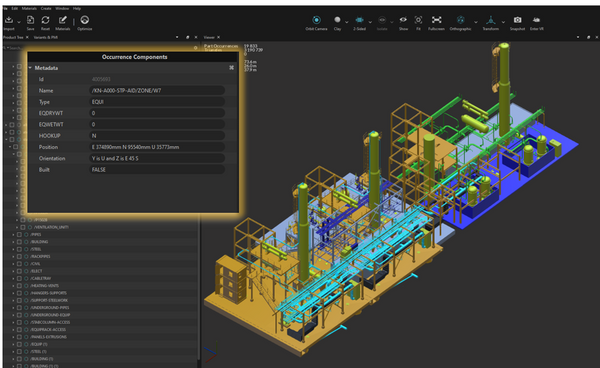
To import metadata from *.att files, the *.rvm and *.att files must share the same name and be located in the same folder.
rvmmetadata

General information on RVM

An *.rvm file can contain both tessellated geometries (meshes) and BREP geometries (CAD surfaces) (see CAD vs Mesh). BREP geometries need to be tessellated by using the Tessellate function. Consider using the Repair CAD function first might be required in order to obtain properly connected meshes.

Copyright © 2026 Unity Technologies
LegalPrivacy PolicyCookiesDocumentation Terms of UseDo Not Sell or Share My Personal InformationYour Privacy Choices (Cookie Settings)

"Unity", Unity logos, and other Unity trademarks are trademarks or registered trademarks of Unity Technologies or its affiliates in the U.S and elsewhere (more info here). Other names or brands are trademarks of their respective owners.

Some pages are machine-translated for convenience, and may contain inaccuracies. In the event of conflicting information, the English version is authoritative.

  • On this page
    • How To

    • General information on RVM


Report a problem with this page