使用示例:使用默认配置值初始化新注册的玩家
Initialize new players with default values in Cloud Save when they first sign up.
阅读时间8 分钟最后更新于 5 个月前
此使用示例演示了如何在新玩家首次注册时使用 Triggers 在 Cloud Save 中以默认生命值和耐力值初始化新玩家。此示例使用 Authentication 服务发出的 事件,并将值记录在 Cloud Save 中。
signedUp先决条件
必须首先创建具有所需访问角色的服务帐户,并配置 UGS CLI。
使用服务帐户进行身份验证
在调用 Triggers 服务之前,必须使用服务帐户进行身份验证。
- 导航到 Unity Dashboard。
- 选择 Administration(管理)> Service Accounts(服务帐户)。
- 选择 New(新建) 按钮并输入服务帐户的名称和描述。
- 选择 Create(创建)。
添加产品角色并创建密钥:
- 选择 Manage product roles(管理产品角色)。
- 将以下角色添加到服务帐户:
- 从 LiveOps 下拉选单中,选择 Triggers Configuration Editor(Triggers 配置编辑者) 和 Triggers Configuration Viewer(Triggers 配置查看者)。
- 从 Admin(管理)下拉选单中,选择 Unity Environments Viewer(Unity 环境查看者)。
- 从 LiveOps 下拉选单中,选择 Triggers Configuration Editor(Triggers 配置编辑者) 和 Triggers Configuration Viewer(Triggers 配置查看者)。
- 选择 Save(保存)。
- 选择 Add Key(添加密钥)。
- 使用 base64 编码方式对 Key ID(密钥 ID) 和 Secret key(密钥) 进行编码。格式为“key_id:secret_key”。请记下此值。
如需了解更多信息,请参阅身份验证。
配置 UGS CLI
按照以下步骤操作以开始使用 UGS CLI:
-
按如下方式配置 Project ID 和环境:
ugs config set project-id <your-project-id>
ugs config set environment-name <your-environment-name> -
使用您先前创建的服务帐户进行身份验证。请参阅接受身份验证。
检查 signed-up 事件
在创建新玩家时,Authentication 服务发出 事件。事件有效负载如下所示:
signed-up{ "playerId": "string", "providerId": "string", "createdAt": "string"}
事件有效负载作为参数传递给 Cloud Code。
请参阅 Authentication:注册以了解更多信息。
设置 Cloud Code
定义一个模块终端或一个脚本,在其中调用 Cloud Save 来使用默认生命值和耐力值初始化经过身份新验证的新玩家。
Cloud Code C# 模块
创建一个包含必需字符串参数 的 模块函数,内容如下:
playerIdInitializeNewPlayerusing Microsoft.Extensions.DependencyInjection;using Microsoft.Extensions.Logging;using Unity.Services.CloudCode.Core;using Unity.Services.CloudCode.Apis;using Unity.Services.CloudCode.Shared;using Unity.Services.CloudSave.Model;public class ModuleSample{ private const string HealthKey = "HEALTH"; private const string StaminaKey = "STAMINA"; private const int DefaultValue = 100; private readonly ILogger<ModuleSample> _logger; public ModuleSample(ILogger<ModuleSample> logger) { _logger = logger; } [CloudCodeFunction("InitializeNewPlayer")] public async Task InitializeNewPlayer(IExecutionContext ctx, IGameApiClient gameApiClient, string playerId) { try { var response = await gameApiClient.CloudSaveData.GetItemsAsync(ctx, ctx.ServiceToken, ctx.ProjectId, playerId, new List<string>() { HealthKey, StaminaKey }); if (response.Data.Results.Count == 0) { await gameApiClient.CloudSaveData.SetItemBatchAsync(ctx, ctx.ServiceToken, ctx.ProjectId, playerId, new SetItemBatchBody(new List<SetItemBody>{new (HealthKey, DefaultValue), new (StaminaKey, DefaultValue)})); _logger.LogInformation("The player has been initialized with the {HealthKey} and {StaminaKey} keys with values of {DefaultValue}", HealthKey, StaminaKey, DefaultValue); } } catch (ApiException e) { _logger.LogError("Failed to initialize player data in Cloud Save. Error: {Error}", e.Message); throw new Exception($"Failed to initialize {playerId} data in Cloud Save. Error: {e.Message}"); } } public class ModuleConfig : ICloudCodeSetup { public void Setup(ICloudCodeConfig config) { config.Dependencies.AddSingleton(GameApiClient.Create()); } }}
部署该模块。
请参阅部署 Hello World 以了解如何部署模块。
Cloud Code JavaScript 脚本
创建一个具有必要字符串参数 的 脚本,内容如下:
playerIdInitializeNewPlayerJavaScript
const { DataApi } = require("@unity-services/cloud-save-1.4");const CLOUD_SAVE_HEALTH_KEY = "HEALTH";const CLOUD_SAVE_STAMINA_KEY = "STAMINA";const DEFAULT_VALUE = 100;module.exports = async ({ params, context, logger }) => { const cloudSaveApi = new DataApi(context); try { // Check if player has been initialized yet const cloudSaveGetResponse = await cloudSaveApi.getItems(context.projectId, params.playerId, [CLOUD_SAVE_HEALTH_KEY, CLOUD_SAVE_STAMINA_KEY]); if (cloudSaveGetResponse.data.results.length === 0) { // Record new values for player await cloudSaveApi.setItemBatch(context.projectId, params.playerId, { data: [ { key: CLOUD_SAVE_HEALTH_KEY, value: DEFAULT_VALUE, }, { key: CLOUD_SAVE_STAMINA_KEY, value: DEFAULT_VALUE, }, ], }); logger.info(`The player has been initialized with the ${CLOUD_SAVE_HEALTH_KEY} and ${CLOUD_SAVE_STAMINA_KEY} keys with values of ${DEFAULT_VALUE}`, { "affectedPlayerId": params.playerId }); return; } logger.info("The player has already been initialized.", { affectedPlayerId: params.playerId }); } catch (err) { logger.error("Failed to update Cloud Save data", { "error.message": err.message }, { "affectedPlayerId": params.playerId }); throw err; }};// Uncomment the code below to enable the inline parameter definition// - Requires Cloud Code JS dev environment setup with NodeJS (https://docs.unity3d.com/Packages/com.unity.services.cloudcode@latest/index.html?subfolder=/manual/Authoring/javascript_project.html)//// module.exports.params = {// playerId: { type: "String", required: true },// };
请参阅部署 Hello World 以了解如何部署脚本。
配置触发器
要将 Cloud Code 资源关联到 Authentication 事件,请创建触发器。触发器会在触发事件时(例如,每次新玩家注册时)执行 Cloud Code 脚本或模块。
signed-up运行 命令在本地创建触发器配置:
new-fileugs triggers new-file triggers-config
如果您创建了 Cloud Code 脚本,请使用以下配置来更新 文件:
triggers-config.tr{ "$schema": "https://ugs-config-schemas.unity3d.com/v1/triggers.schema.json", "Configs": [ { "Name": "initialize-new-player", "EventType": "com.unity.services.player-auth.signed-up.v1", "ActionUrn": "urn:ugs:cloud-code:InitializeNewPlayer", "ActionType": "cloud-code" } ]}
如果您创建了 Cloud Code 模块,请使用以下配置来更新 文件:
triggers-config.tr{ "$schema": "https://ugs-config-schemas.unity3d.com/v1/triggers.schema.json", "Configs": [ { "Name": "initialize-new-player", "EventType": "com.unity.services.player-auth.signed-up.v1", "ActionUrn": "urn:ugs:cloud-code:ModuleSample/InitializeNewPlayer", "ActionType": "cloud-code" } ]}
使用 UGS CLI 工具部署此配置:
ugs deploy triggers-config.tr
您应该会看到类似于以下内容的响应:
Deployed: triggers-config.tr
现在,您有了一个触发器会在玩家注册时执行 Cloud Code 脚本或模块。
验证结果
要验证结果,请使用 Authentication 服务注册新玩家。要执行此操作,可以调用任何通过玩家身份验证的 Unity 游戏服务。
例如,要触发玩家身份验证流程,您可以通过 Unity Dashboard 的 Cloud Code 脚本页面生成新的玩家 ID。
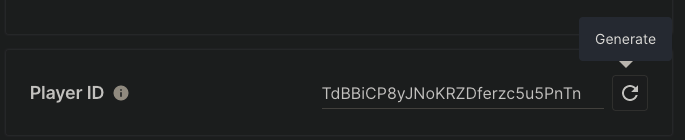
如果触发器配置为在发生 事件时触发,则对于每个注册的新玩家,其值都会在 Cloud Save 中初始化。
signed-up- 导航到 Unity Dashboard。
- 选择 Products(产品)> Player Management(玩家管理)。
- 从列表中选择一名玩家。
- 导航到 Cloud Save > Data(数据) 选项卡。
- 您应该可以找到默认值为 的
100和HEALTH键。STAMINA