Attention: Unity Reflect is deprecated, and is no longer available from December 2024. Unity no longer provides support for Reflect. The Unity Cloud Reference Project has replaced Reflect Develop.
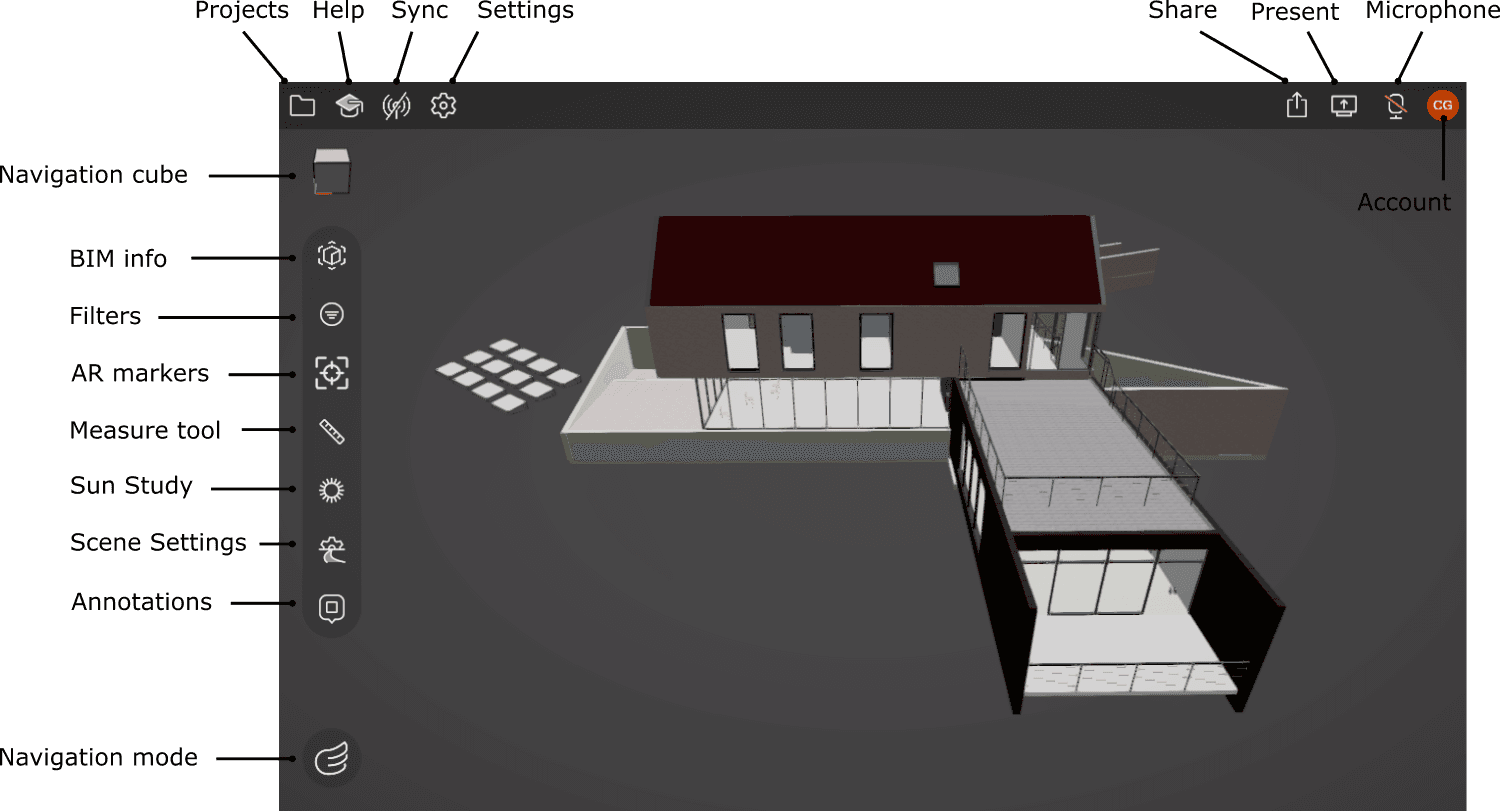
Find your way around Reflect Review
Syncing and accounts
Turning the sync service on or off
Click or tap the Sync icon to turn the sync service on or off.
- When the service is active, the icon looks like this:

- When the service is inactive, the icon looks like this:

Opening the Projects screen
Click or tap the Projects icon to show or hide the Projects screen.
Logging out
To log out, click the Account icon in the top right corner of the viewer > Logout.
Customizing the view
Filtering BIM data
Click or tap the Filters button to toggle the visibility of BIM data.
- Click or tap the eye icon next to each filter to turn it on or off.
- To see a different group of filters, click or tap Category and select a category from the drop-down menu.
Toggling texture and light data
Click or tap the Scene Settings button to turn texture and light data on or off.
Use the Measure tool
To measure the distance between two points in your model, click or tap the Measure tool icon: ![]()
Click or tap your model to set the first point, then do the same for the second point.
Note: To leave the first point in place and move the second point, drag the arrows next to the second point. Reflect updates the distance in real time.
To reset the Measure tool, click the ↻ icon.
To close the Measure tool, click the Measure tool icon again.
Adjusting the position of the sun
The Sun Study button lets you adjust the position of the sun based on a specific time, date, and location.
You can control any of the following parameters:
| Parameter | Description |
|---|---|
| Time of Day | The time of day in 24-hour format. |
| Time of Year | The day and month of the year. |
| UTC Offset | The time difference from UTC in hours and minutes. |
| Latitude | Latitude of the desired location. (0 degrees is the equator, 90 degrees is the North Pole, and -90 degrees is the South Pole.) |
| Longitude | Longitude of the desired location. (0 degrees is Greenwich, with positive values to the east and negative values to the west.) |
| North Angle | The direction of north in degrees. |
Displaying stats
To display real-time statistics about your scene, click or tap the Settings icon and enable Stats Info.
Click or tap the Settings icon again to close the menu.
Moving around
Use the navigation cube
Click or tap the navigation cube for easy access to left, right, and top views of your model.
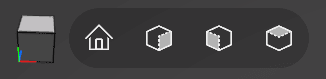
To return to the default view, click or tap the house icon.
Change your navigation mode (Windows)
The button in the lower right corner of the Viewer displays the current navigation mode. Click this button to expand the navigation mode menu.
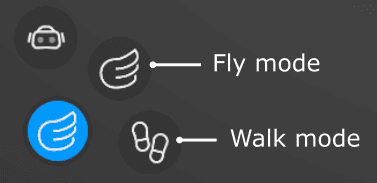
Click a button to select the corresponding navigation mode.
Fly mode
In Fly Mode, you can move, orbit, and zoom around your scene in three dimensions.
Move (Pan)
To move the camera from your current position, use the WASD keys to move left, right, forward, and backward and the Q and E keys to move up and down.
To pan the camera freely, click and drag with the middle mouse button or hold the Alt key while you click and drag.
Orbit
To rotate the view around your current position, right-click and drag.
Zoom
Use your scroll wheel to zoom in and out. You can also double-click a point to jump there quickly.
Walk mode
To walk around with the camera at eye level, use the WASD keys to move left, right, forward, and backward.
Change your navigation mode (iOS/Android)
The button in the lower right corner of the Viewer displays the current navigation mode. Tap this button to expand the navigation mode menu.
Fly mode
In Fly Mode, you can move, orbit, and zoom around your scene in three dimensions.
Move (Pan)
To pan the camera freely, tap and drag with two fingers.
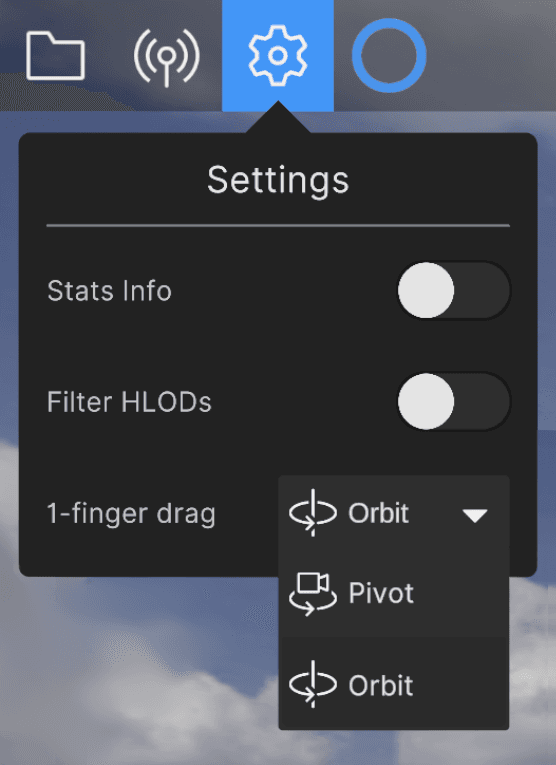
Orbit or Pivot
To rotate the view around your current position, tap and drag with one finger. To switch between Orbit and Pivot mode, click the Settings icon (⚙) and select your desired mode for 1-finger drag from the drop-down menu.
Zoom
Pinch with two fingers to zoom in or out.
Walk mode
To walk around with the camera at eye level, tap and drag the on-screen cursor with one finger.
Use the Measure tool
To measure the distance between two points in your model, click or tap the Measure tool icon: ![]()
Click or tap your model to set the first point, then do the same for the second point.
Note: To leave the first point in place and move the second point, drag the arrows next to the second point. Reflect updates the distance in real time.
To reset the Measure tool, click the ↻ icon.
To close the Measure tool, click the Measure tool icon again.