Download and install the Unity Editor
Use the Unity Hub to install and uninstall supported and archived versions of the Unity Editor.
읽는 시간 4분최근 업데이트: 6달 전
You can either download Editor instances from the Hub, or add manually downloaded Editor instances to the Hub.
Install the Editor
To install a version of the Editor through the Hub, do the following:
- Open the Hub.
- Select Installs in the left sidebar.
- Select Install Editor at the top right of the window. This opens a window that displays the official releases that are available to install in the following tabs:
- Official releases: Long term support (LTS) releases, which provide a stable foundation for projects.
- Pre-releases: Versions of the Editor in the alpha or beta stage of release.
- Archive: A link to Unity's download archive, where you can download older, unsupported versions of the Editor. For more information on installing archived versions of the Editor, refer to Install an archived Unity Editor version.
- Choose which version of the Editor you want to install, and then select Install.
- A window appears that you can use to select any modules to install with the Editor. You can also add modules after you install the Editor through the Hub.
- Select Install. This starts the download process, which you can then monitor in the Downloads section of the toolbar of the Hub.
For information on how to manage and change the install location of Editor instances, refer to the Settings reference.
Install an archived Unity Editor version
If the Hub doesn't display the specific Editor version that you need, you can download it from Unity's download archive:
- Open the Hub.
- Select Installs in the left sidebar.
- Select Install Editor at the top right of the window, and select the Archive tab.
- Select the link for the download archive. This webpage shows all previous versions of the Unity Editor that are available to install.
- Select the Install link in the Hub installation column. A dialog appears which requests permission to open the Hub.
- A window appears that you can use to select any modules to install with the Editor. You can also add modules after you install the Editor through the Hub.
- Select Install. This starts the download process, which you can then monitor in the Downloads section of the toolbar of the Hub.
Add a manually downloaded Editor to the Hub
You can add a version of the Editor from your local disk if you have already downloaded the files. To add the pre-downloaded version, do the following:
- Open the Hub.
- Select Installs in the left sidebar.
- Select Locate at the top right of the window. This opens your system's file manager at the default installation location for Unity program files.
- Locate the Editor, and select Select Editor to add it to the Hub.
Downloads
To see the progress of any Editor you're downloading, select the Downloads icon in the toolbar of the Hub window.
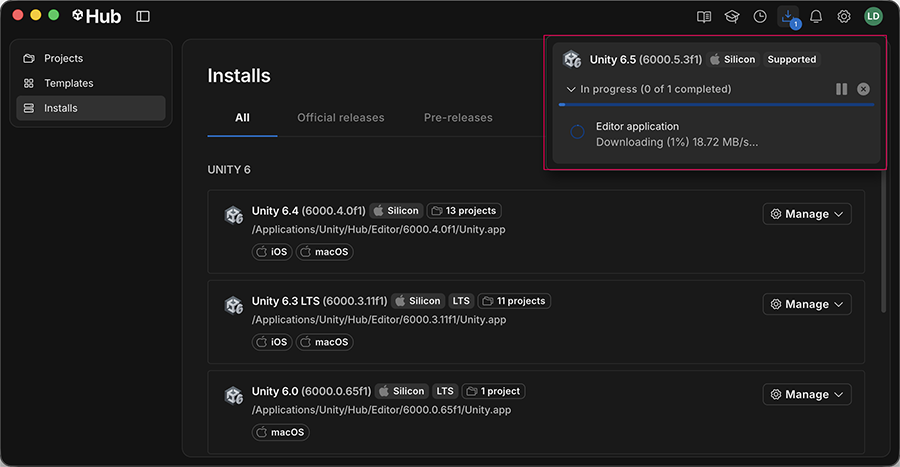
The Downloads section of the toolbar
The Downloads panel displays the download and installation progress of any of your active downloads through the Unity Hub. It also displays any recent downloads that have completed.
To view detailed information about the download and install process, select the dropdown arrow on the left. To cancel the pending items at any point of the download/installation process, select the x button next to the group.
Manage Editor installs
Use the Installs panel to manage Editor installations on your machine. When you navigate to the Installs panel, it displays a list of all Editor installs created from, or added to the Hub. It also displays the installation location of the Editor, and the number of projects on your machine that use this version of the Editor.
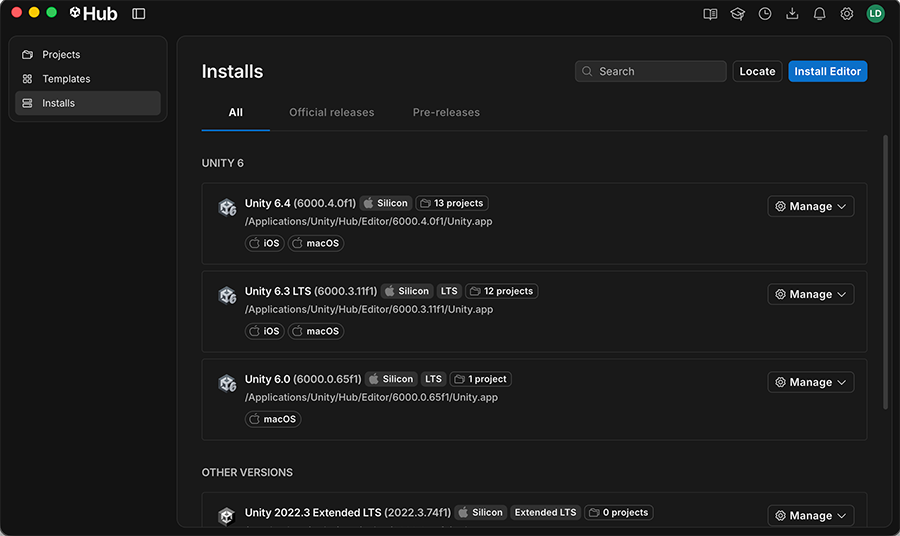
The Installs panel of the Unity Hub
Use the Manage dropdown menu to perform the following tasks:
Task | Description |
|---|---|
| Add modules | Add modules to the Editor. |
| Reveal in Finder (macOS) Show In Explorer (Windows) | Opens a system window at the Editor installation file location. |
| Release notes | Opens a web browser window with the release notes for this version of the Editor. |
| Uninstall | Uninstall the Editor version. The uninstall option is applicable for Editor versions that you installed through the Hub. For versions of the Editor that you installed manually and located through the Hub, you can select Remove to remove the version from the Hub, but this leaves the files on your disk. To remove the files, you need to navigate to the file path of the Editor and manually delete the Editor folder. |
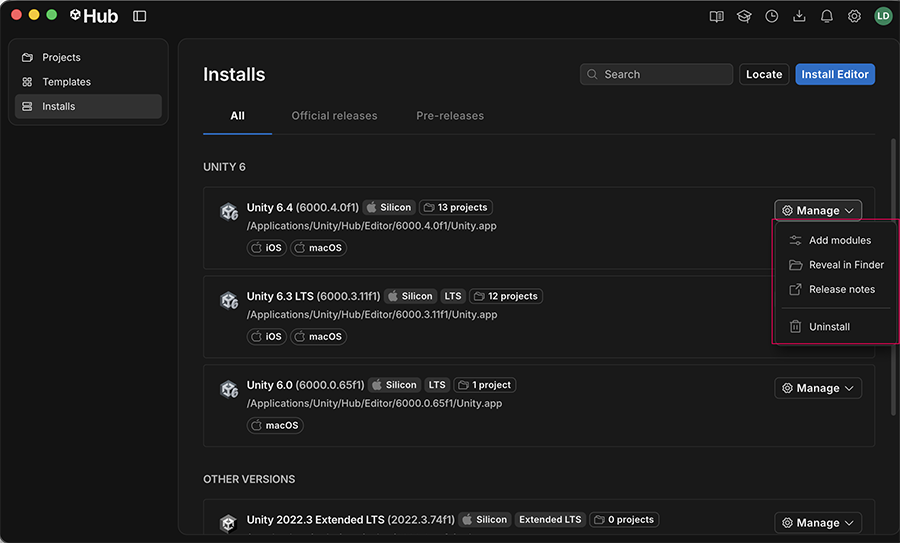
The Manage dropdown of the Installs panel