Work with elements
Learn how to structure UI controls in your project.
Read time 2 minutesLast updated 23 days ago
The most basic building block in UI Toolkit is a `VisualElement'. These elements are ordered into a hierarchy tree with parent-child relationships. This is called the visual tree.
Add elements
You need to add elements to the hierarchy to create UI. To add an element to the hierarchy in UI Builder, drag it from the Library tab into the Hierarchy window. You can also double-click on an element in the Library to append it to the Hierarchy. By default, elements aren't named, so they appear in the Hierarchy as their type name.
To name an element, double-click on the item in the Hierarchy, or update the Name attribute in the element's Inspector window.
Unique naming in UI Toolkit isn't enforced, so they're only for identification within the UI. UI Builder doesn't use element names for any internal identification or functionality.
Reorder elements
To reorder elements, you can drag one or more elements in the hierarchy or move them between parents:

Reorder in hierarchy
You can also drag elements into and from the Canvas, where a yellow line appears to indicate the element placement:

Reorder in Canvas
Change attributes in the Canvas
The only attribute you can change directly in the Canvas is the attribute on text elements such as a or a . To change the attribute in the Canvas, double-click on it in the Canvas.
textButtonLabeltext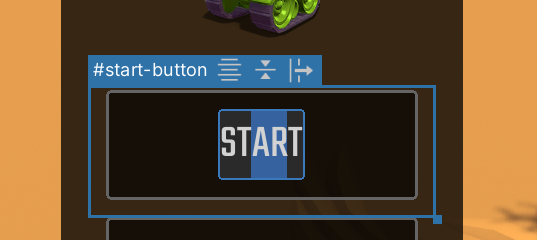
Edit button text in Canvas
To commit the change, press the Enter key. If the attribute contains newline characters, use Shift + Enter to commit the change.
textTo cancel the change, press the Esc key.