Add modules to a Unity Editor installation
Modules are optional components you can use to tailor your Unity Editor installation; they contain build support for certain platforms, language packs, and developer tools.
Read time 2 minutesLast updated 6 days ago
You can select modules during a new Editor installation, or add modules to existing installs.
You can limit the file size of the Editor if you select only the modules that you require.
Add modules to a new install of an Editor
When you install a new Editor, you can choose to install modules as part of the Editor installation process. For more information, refer to Install the Editor.
Add modules to an existing Editor installation
To add modules to an existing Editor installation:
- Open the Hub.
- Select Installs in the left sidebar.
- Navigate to the Editor version you want to add modules to, and select Manage.
- Select Manage modules.
- A window opens with all the available modules for the selected Editor. Choose the modules you want to install, and then select Install.
- The Hub starts downloading the modules, and you can view the progress in the Downloads window
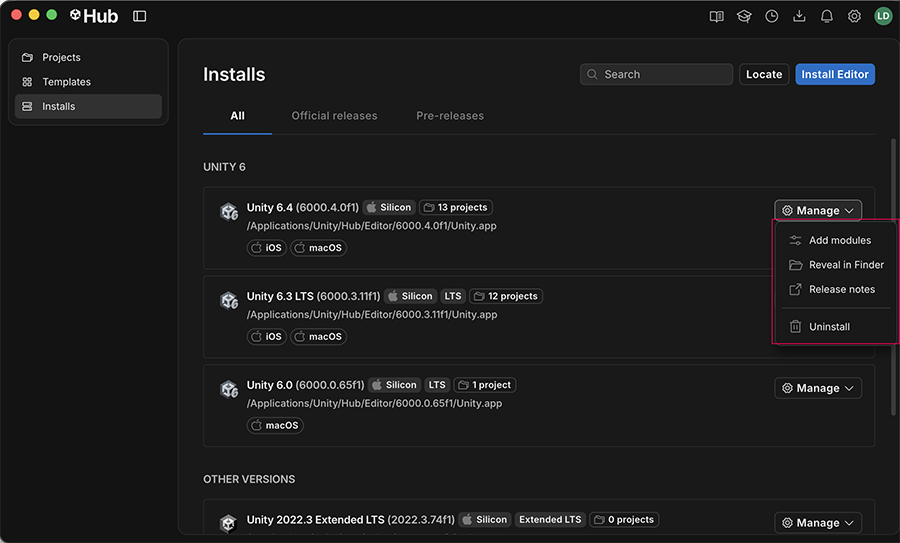
The Manage dropdown of the Installs panel