Install Audiokinetic Wwise
Integrate version control with your audio engine.
阅读时间3 分钟最后更新于 1 年前
Open the Download page and click the big Download button. You'll need to sign in before you can actually download the tool. You need an account anyway to open Wwise.
The installer will open the Audiokinetic launcher, which will help you install whatever version of Wwise you need.
In the left menu, you can open the Wwise section to manage installations of Wwise on your computer. Under "Install new version", you can use the dropdown list to select any desired version. Note that only latest versions of each branch are listed by default. In case you need an intermediate version, you can select instead of in the first dropdown.
AllLatestOnce you find the right version of Wwise, you can proceed with the installation by clicking "Install..." at the bottom.
As part of the installation process, you can select a series of packages and development platforms to be included in the installation.
Once installed, you could launch Wwise by clicking the "Launch Wwise (64-bit)" button next to the version that you want.
But watch out! You need to install the plugin first.
Install the plugin
The Unity Version Control installer includes a set of plugins for Wwise under the installation folder, typically , based on the version of Wwise you want to use.
C:\Program Files\PlasticSCM5\client\plugins\wwise- PlasticSCMWwisePlugin2019.dll (Wwise SDK 2019)
- PlasticSCMWwisePlugin2022.dll (Wwise SDK 2022)
- PlasticSCMWwisePlugin2023.dll (Wwise SDK 2023)
In order to install the plugin, you just need to copy the DLL file matching your Wwise version under the corresponding Wwise installation folder, normally
C:\Program Files (x86)\Audiokinetic\Wwise x.y.z\Authoring\x64\Release\bin\SourceControlOnce you copy the DLL, you can launch Wwise and it will detect Plastic SCM as an available VCS.
Configure the plugin
After loading a project, either a new or existing one, you need to configure Wwise to use Plastic SCM as version control.
First, you need to ensure that the Wwise project is contained within a Plastic workspace (at the moment, workspaces cannot be created directly from Wwise).
Then, go to Project > Project Settings or press Shift + K to open the Project Settings dialog.
Change the "Plug-in" dropdown selector under "Source Control" to "Plastic SCM".
The "Config..." button will become enabled, so click it to display the following version control settings:
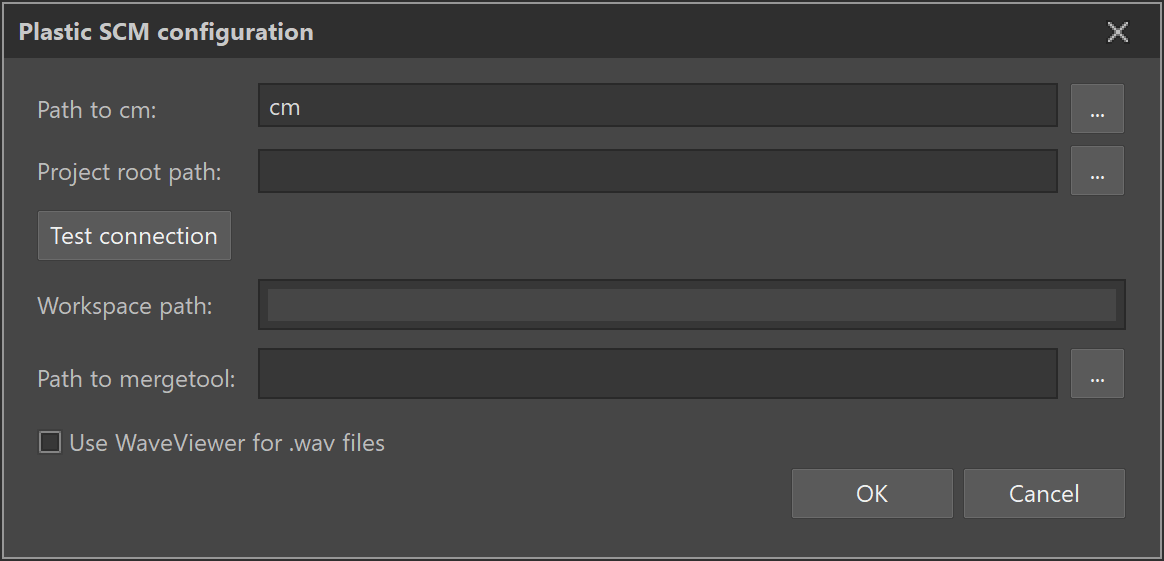
The Plastic SCM configuration settings for the Wwise plugin.
Path to cm - Full path to your CLI executable. Note that the Unity Version Control installer configures the alias for you automatically, which should be enough. However, you can use this field to reference a different path to your preferred .
cmcm.exeProject root path - Full path to your project directory. This might not be the same as the workspace root.
Test connection - Helping button to test the connection to your Unity Version Control workspace.
Path to mergetool - You can optionally define the mergetool path to launch diffs from inside Wwise.
Operations
You can perform VCS operations from the Project Explorer inside Wwise by right-clicking items and expanding the Source Control actions.
If you want to have a general overview of your project and update/checkin items globally, you can open the File Manager.
You can do that by selecting menu item Project > File Manager or by pressing Shift + F1.
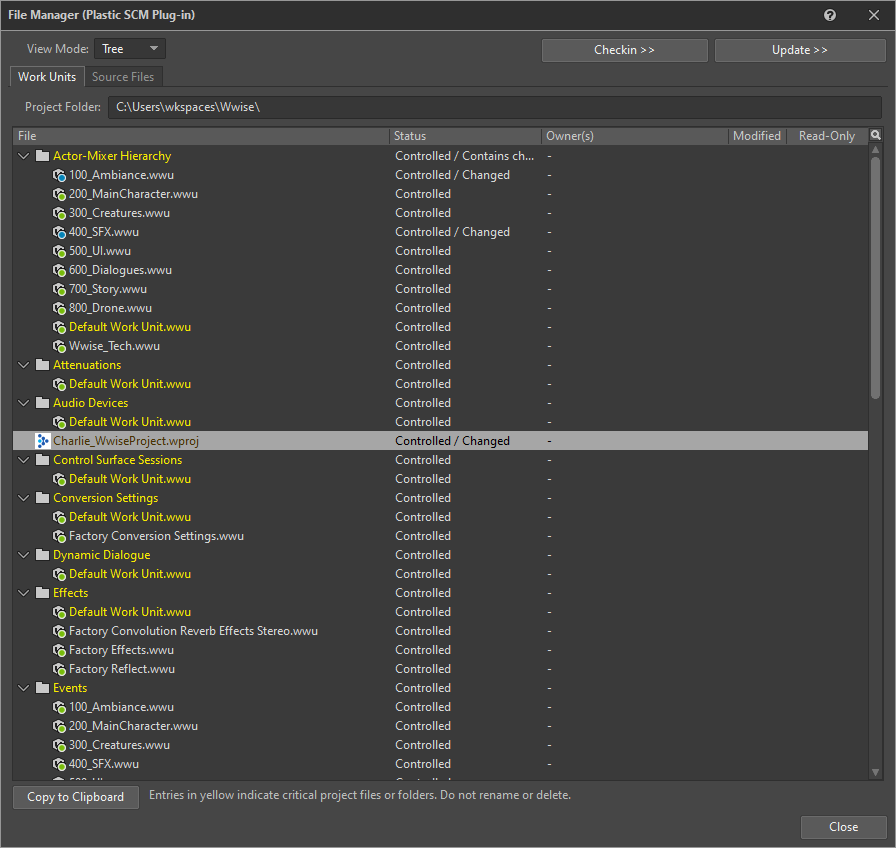
An example of a populated file manager window that lists the files and their statuses.
In the File Manager window, you can either right-click items to perform VCS actions (multiple selection is allowed) or click the "Checkin" or "Update" actions. Those will checkin/update all applicable items in the workspace.