Create a test assembly
Create an assembly that Unity recognizes as containing tests.
Read time 2 minutesLast updated 13 days ago
Unity Test Framework tests must be in a test assembly, which is any assembly that references NUnit. For more information on assemblies, refer to Organizing scripts into assemblies.
To create a new test assembly in the Test Runner window:
- Select the folder in your Project window.
Assets - Open the Test Runner window (menu: Window > General > Test Runner).
- In the Test Runner window, select Create a new Test Assembly Folder in the active path.
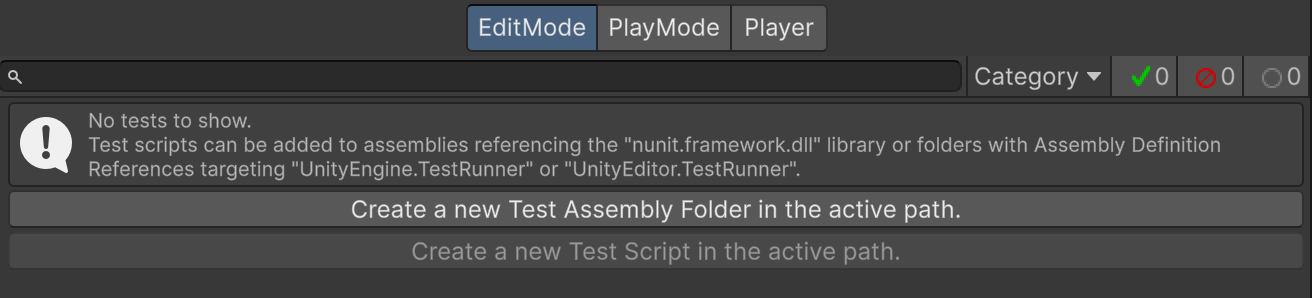
The Test Runner window with the EditMode tab selected.
Alternatively, you can create a test assembly directly from the Assets menu:
- Select the folder in your Project window.
Assets - Create a new Test Assembly Folder (menu: Assets > Create > Testing > Test Assembly Folder).
This creates an subfolder inside the folder with a corresponding file including the required references. You can change the name of the new assembly definition and press Enter to accept it.
TestsAssets.asmdef
The Project window displays a new subfolder of the Assets folder called Tests, which contains an assembly file called Tests.asmdef.
Click on the assembly definition file to inspect it in the window. You'll see that it has references to ,, and assemblies. This combination of references is what identifies an assembly as a test assembly. The reference is only available for Edit mode tests.
Inspector
?
nunit.framework.dllUnityEngine.TestRunnerUnityEditor.TestRunnerUnityEditor.TestRunnerThe checkbox selections under Platforms determine which platforms the test assembly can run on. By default, assemblies created through the Test Runner target the Editor only. Selecting Any Platform or a specific platform other than Editor makes it possible to run any Play mode tests in the assembly on standalone Players for the additional platforms.

The Inspector window displays the configurable properties of a test assembly definition asset.
You can repeat the steps above as many times as you like to create additional test assemblies. The first test assembly folder you create is named by default and subsequent ones are named , , and so on. Remember that you can always rename the assemblies but each assembly name must be unique.
TestsTests 1Tests 2