Enabling Unity Ads in your project
Enable Unity Ads in your project to monetize your app.
Read time 3 minutesLast updated 9 hours ago
After you've finished developing your app and have created a Unity Cloud project you can monetize the app through the Unity Ads Monetization dashboard to start earning revenue.
Selecting Enable Ads will open the workflow to set your mediation solution. If you'll be using mediation for your app, choose your mediation partner and provide the necessary project information and Store ID. If you're not using mediation and only Unity Ads, simply enter your project information and Store ID.
Complete the following steps to set up a Unity Ads project in the Monetization dashboard:
- Enable Ads in the Monetization dashboard.
- Select a mediation solution.
- Copy or start a new project.
- Select a placement setup (only applicable for mediated projects).
- Set your app Store ID.
Enable Ads in the Monetization dashboard
To implement bidding in your project, you must Enable Ads in the Monetization dashboard from the navigation menu. Doing so allows you to set up your project to implement monetization for your iOS or Android app, or an app that is compatible with both.
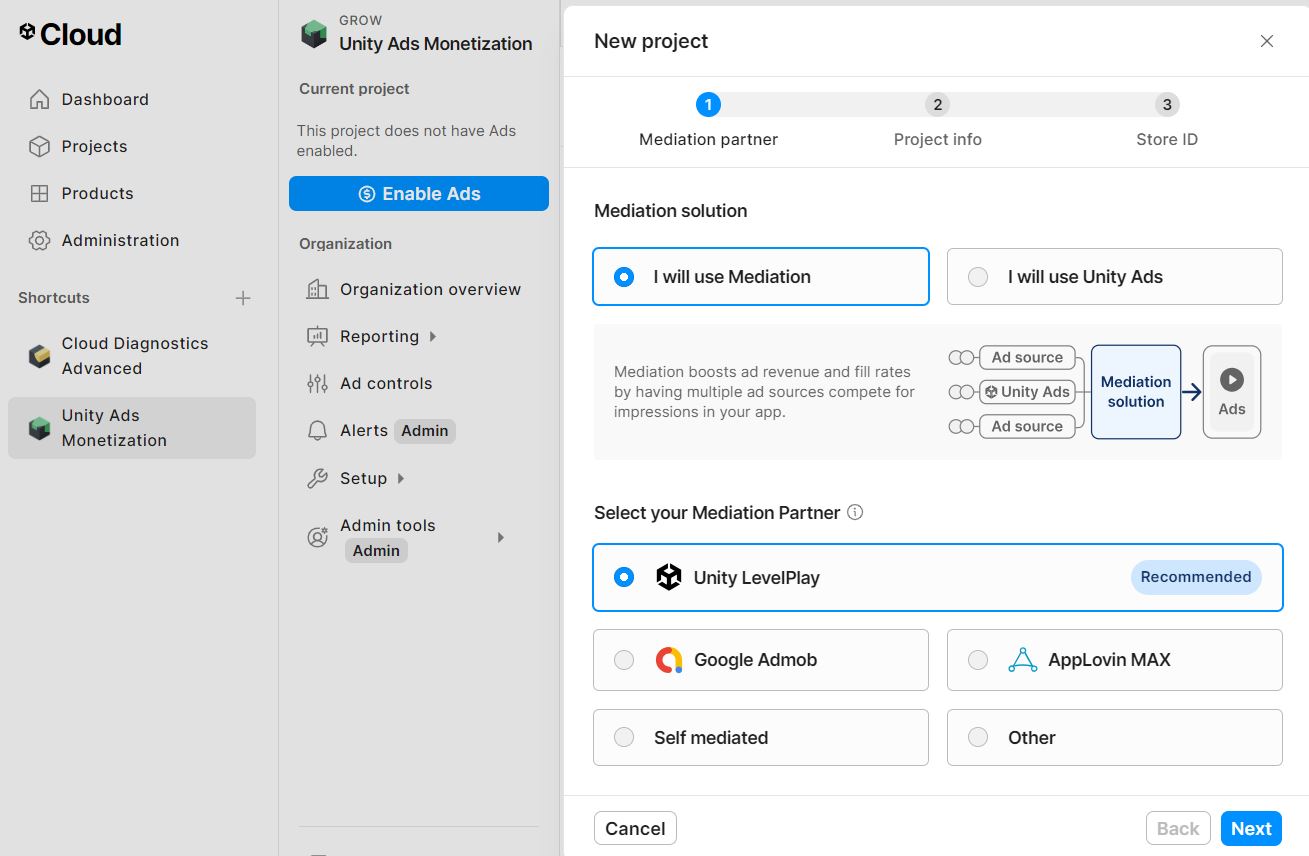
Select a mediation solution
Mediation helps you maximize ad revenue and optimize fill rates by managing multiple ad networks and automatically selecting the highest-paying ads for each request.
If you plan to use mediation in your project, select I will use Mediation. In the Monetization dashboard, choose between a supported third-party mediation partner or your custom solution by selecting Self mediated. If you're using mediation with a different mediation platform, select Other.
If you don't plan to use a mediation service, select I will use Unity Ads to indicate you will only monetize through Unity's ad network inventory.
Copy or start a new project
You have the option to start a new project or copy an existing project and all of its applicable project settings.
Copying existing project settings is useful when creating similar apps, testing different configurations, performing A/B tests, or launching updates without reconfiguring settings manually. Doing so saves time and ensures consistency by duplicating project settings, monetization settings, and initializing your project with the same project settings as an existing project you specify.
All project settings that are copied to a new project can be edited later; however, some information can't be copied. Refer to the following table for which project settings can and can't be copied from an existing project:
Settings copied | Settings not copied |
|---|---|
|
|
If you don't want to copy settings from an existing project, you can start a new one with no predefined settings.
Select a placement setup
To get started with a monetization strategy for your app, select either a pre-built bidding placement that meets your needs as a publisher.
Bidding setup
Bidding is a simple method where multiple ad networks compete in real-time, and the highest bid wins the ad impression.
Set your app Store ID
If your app is already published and live in one or more app stores (for example, the Apple App Store and the Google Play Store), the recommended best practice is to enter both store IDs when you initialize Ads in the Monetization dashboard. Entering the IDs maximizes your exposure to ad inventory and revenue opportunities.
If your app is not live in an app store yet, you can add the Store IDs later when your app is published to optimize revenue. Each store has a unique Store ID for your app, so if your app is compatible with the iOS and Android platforms, you'll be able to find the Store IDs in the Apple App Store and Google Play Store, respectively.
Store IDs fetch store information like app category and icon. For more information, refer to the Store IDs documentation.