Install the Unity Editor for Embedded Linux
You can install and set up the Unity Editor for Embedded Linux on your Windows, Linux, and MacOS systems.
Note: Unity Editor for Embedded Linux is available under separate terms. For licensing and download information, contact your Account Manager or the Unity Sales team.
System requirements
The system requirements for the Unity Editor, Player, and Server are the same as outlined in the Unity Core Manual.
Windows
- Double-click UnitySetup64.exe to install Unity setup for Embedded Linux to your preferred location.
- Double-click UnitySetup-Embedded-Linux-Support-for-Editor.exe and install Unity Editor for Embedded Linux in the same folder.
Linux
- Unpack Unity.xz to install Unity setup for Embedded Linux to your preferred location.
- Unpack UnitySetup-Embedded-Linux-Support-for-Editor.xz to the same folder.
MacOS
- Double-click the Unity.pkg and install Unity setup for Embedded Linux to a folder of your choice.
- Install UnitySetup-Embedded-Linux-Support-for-Editor.pkg to the same folder.
Project Setup
After you create a new project with the newly installed Unity, you must install the toolchain and SDKs packages.
To install a Unity Embedded Linux toolchain and SDKs packages:
Go to Window > Package Manager.
Use the Adding a registry package by name method to install packages because they might not be visible by default.
Note: If you're using the 2020.3 Editor version, then you add a package using the Add package from git URL option from the Add menu in the Package Manager window.
Depending on the operating system you're using, install one of the following toolchain packages:
Host Package Windows com.unity.toolchain.win-x86_64-embeddedlinux MacOS com.unity.toolchain.macos-x86_64-embeddedlinux Linux com.unity.toolchain.linux-x86_64-embeddedlinux Install the SDKs packages that match with the target architecture you want to use:
Host Package aarch64 com.unity.sdk.embeddedlinux-aarch64 x86_64 com.unity.sdk.embeddedlinux-x86_64 arm32 com.unity.sdk.embeddedlinux-arm32 x86 com.unity.sdk.embeddedlinux-x86
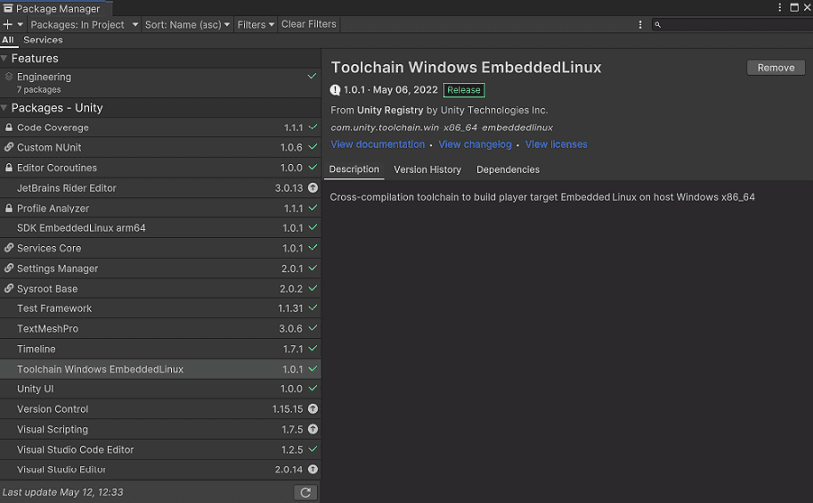
After you've installed the packages, the Package Manager window displays the toolcahin and SDK packages that are installed for Embedded Linux.

Automated packages installation
You can also install the required Embedded Linux packages automatically from the Build Settings window. To initiate the automatic installation of packages:
Go to File > Build Settings from Unity’s main menu. In the Platform list, select Embedded Linux and then click Switch Platform.
Open the Project Settings window by clicking Edit > Project Settings window.
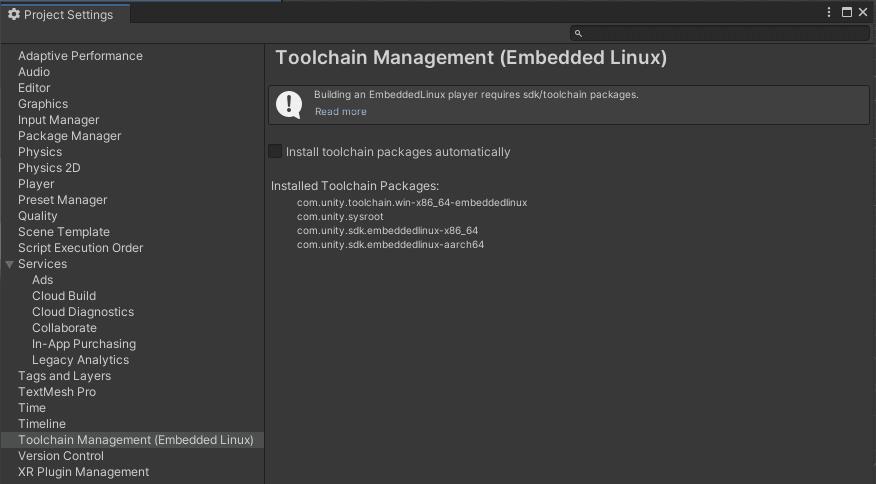
If your Editor has the Install toolchain packages automatically option enabled by default, then the required packages such as the toolchain and SDKs for installed architectures are installed automatically. After the package installation process is complete, you can check which packages are installed in the Toolchain Management (Embedded Linux) tab in Project Settings.

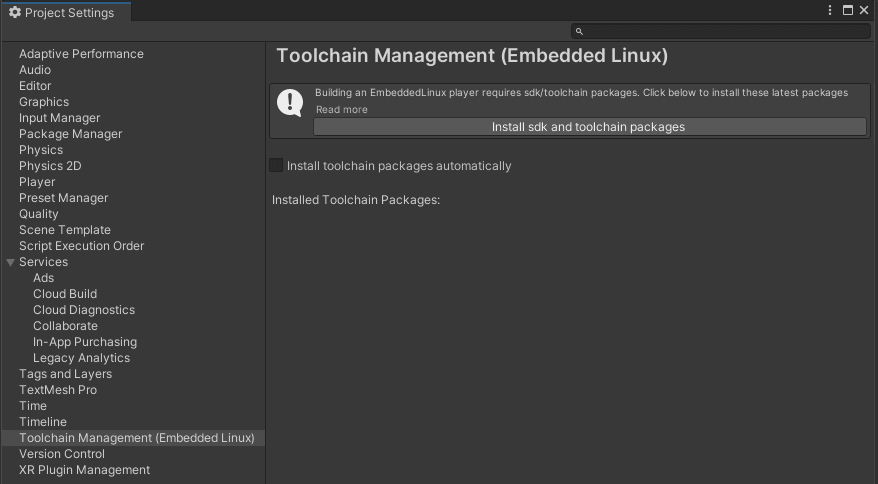
If the option to automatically install packages is disabled, you can switch to the Toolchain Management (Embedded Linux) tab and click Install sdk and toolchain packages.
After you've installed the packages, the Package Manager window displays the list of all the toolchain packages that are installed for Embedded Linux.

Additional resources: