Daily rewards
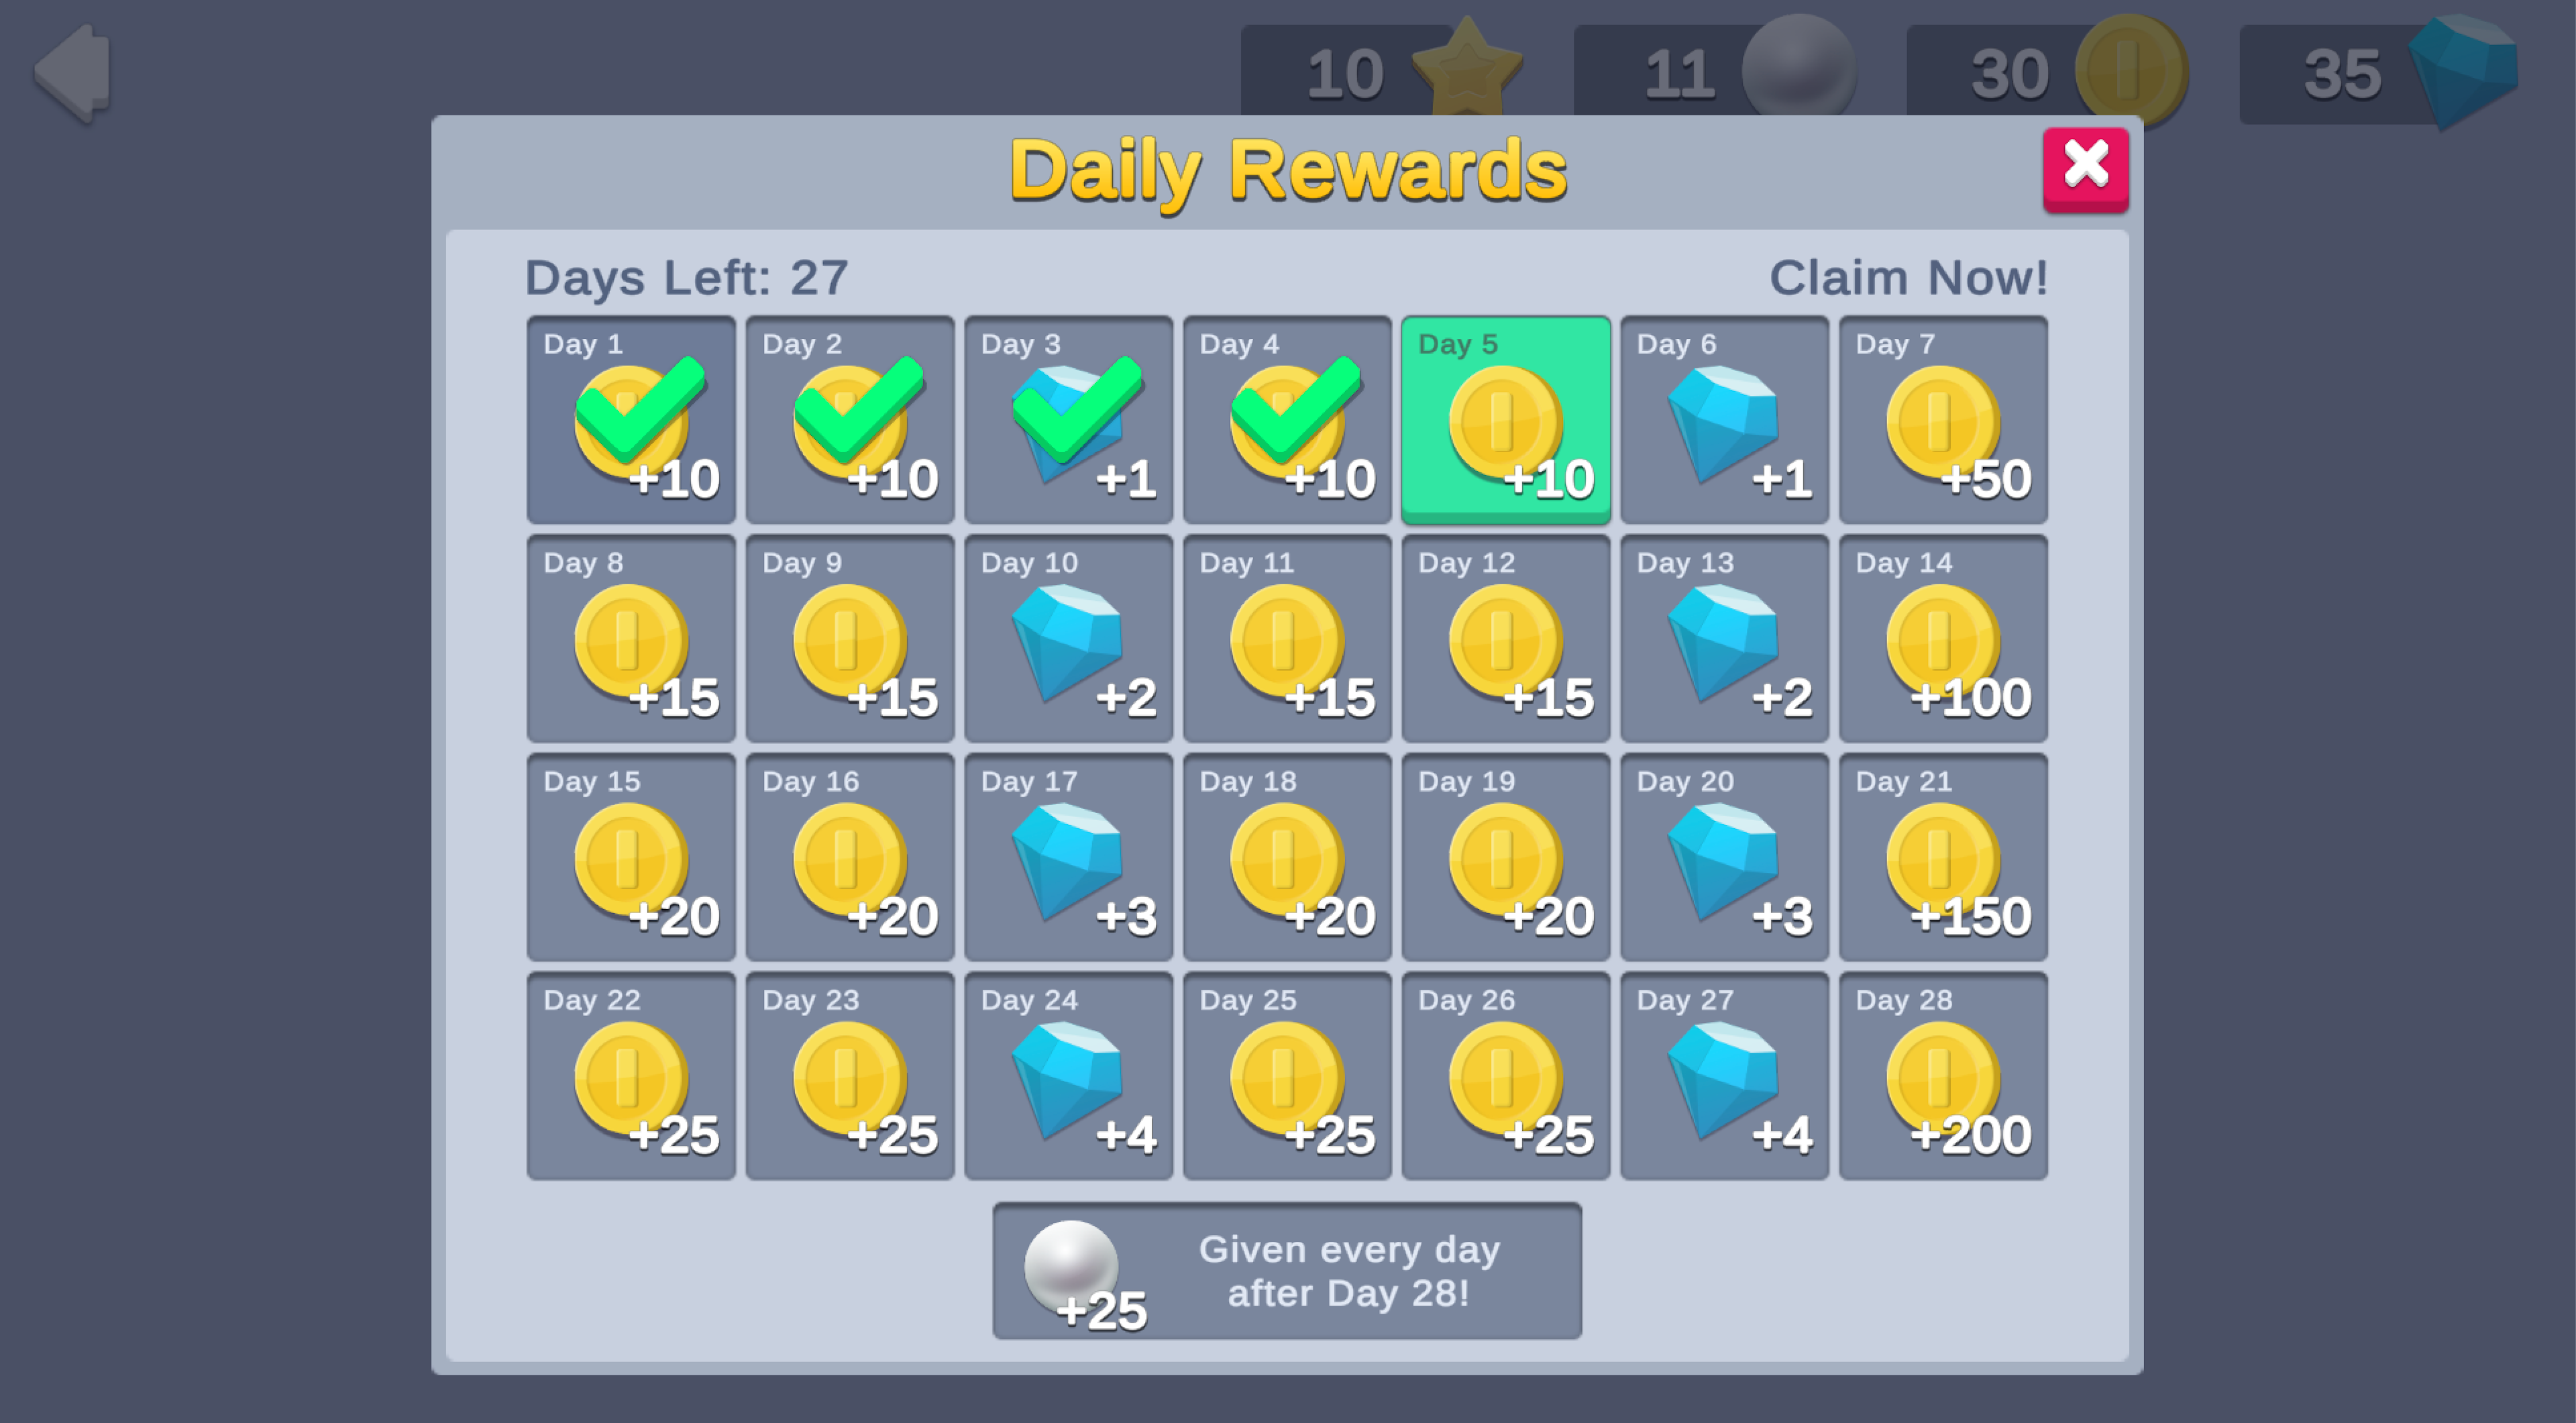
Daily reward calendars are prevalent engagement features that can boost retention in games of all genres. Showing players an escalating series of rewards in advance incentivizes them to keep signing in to claim better and better prizes. This sample demonstrates how to present a calendar of rewards that increase in value over time, which encourages players to return each day to claim them. This implementation permits skipping days, but the player always claims rewards sequentially. If they miss a day, the same reward is available the next day. The player must claim a given day's reward to unlock the subsequent day's reward.
Prerequisites
To use this sample use case, you must download and install the UGS Use Cases project in your Unity project.
Overview
This sample demonstrates how to initialize Unity Services, retrieve and update current values from the Economy service, call Cloud Code to retrieve the updated status, and then claim each day's reward.
Note: Unity recommends implementing daily rewards by setting the start epoch time with Remote Config so all players experience the event starting on the first day of the month. However, to facilitate testing, this implementation saves the event start value to Cloud Save, so the event "month" starts when you first open the scene. Each "day" is also compressed into 30 seconds, which allows you to quickly test claiming an entire month's rewards.
To see this use case in action, open the samples menu and navigate to Daily Rewards. To open this scene directly and interact with the use case:
- In the Unity Editor Project window, select Assets > Use Case Samples > Daily Rewards, then double-click
DailyRewardsSample.unityto open the sample scene. - Press Play to enter Play mode.
Initialization
The DailyRewardsSceneManager.cs script performs the following initialization tasks in its Start function:
- Initializes Unity Gaming Services.
- Signs in the player anonymously using the Authentication service. If you’ve previously initialized any of the other sample scenes, Authentication will use your cached Player ID instead of creating a new one.
- Retrieves and updates the player's currency balances from the Economy service.
- Retrieves all the currency sprites from the Addressables service so they can be displayed in the calendar.
- Retrieves the daily rewards event status from the Remote Config service, to display claimed days and days remaining in the calendar.
Functionality
When you dismiss the event prompt, the scene begins tracking the passage of time to determine whether you claim a reward within the eligible window for a given day. For testing purposes, each "day" lasts about 30 seconds. Each calendar node has a Claim button that is only active when two conditions are met:
- The previous day's reward has been claimed.
- A new “day” has begun.
When you click an active Claim button, you receive the reward for that day. The following occurs:
- The button's
OnClickmethod executes theDailyRewardsSceneManager.csscript'sOnClaimButtonPressedfunction, which verifies that the player is signed in, and then calls theDailyRewards_ClaimCloud Code script to grant the reward and update the event state to record days collected and the last claim time. - The Economy service updates the player's currency balances and returns the new values to the client to update the currencies HUD.
If the client remains idle (you do not claim the reward within a day's timeframe), the Days Left UI indicator decreases, which indicates that you missed a day. If you miss a day, you can still claim the previous day's reward.
In this sample, the month is 31 days. If you claim rewards for at least 28 days in that month, you are eligible for a bonus reward each additional day until the event ends (up to 3 times, if every day is collected on time). When the event ends (31 days expire), you can dismiss the daily rewards window and click the Daily Rewards button in the bottom-right corner to begin a new event.
Setup
Requirements
To replicate this use case, you'll need the following Unity packages in your project:
| Package | Role |
|---|---|
| Addressables | Allows asset retrieval by address. |
| Authentication | Automatically signs in the user anonymously to keep track of their data server-side. |
| Cloud Code | Accesses the current event status, claims daily rewards, and resets the feature at the end of the month for demonstration purposes. It also calls Remote Config to determine the parameters to use for the daily rewards (such as which rewards to grant and in what quantities). |
| Cloud Save | Stores and retrieves event status data (such as start epoch time and the number of days successfully claimed). |
| Deployment | Provides a cohesive interface to deploy assets for Cloud Services. |
| Economy | Retrieves the player's starting and updated currency balances at runtime and receives requests directly from Cloud Code to grant rewards. |
| Remote Config | Defines parameters for the daily rewards event. |
To use these services in your game, activate each service for your Organization and project in the Unity Cloud Dashboard.
Unity Cloud services configuration
To replicate this sample scene's setup in your own Unity project, configure the following items:
- Cloud Code scripts
- Economy items
To configure these items you can use the Deployment package, or manually enter them using the Unity Cloud Dashboard. The recommended best practice is to use the Deployment package as it greatly accelerates this process.
Using the Deployment package
To deploy configurations using the Deployment package:
- Open the Deployment window.
- Check in
CommonandDaily Rewards. - Click
Deploy Selection.
This deploys all the necessary items.
Using the Unity Cloud Dashboard
You can use the Unity Cloud Dashboard to manually configure your services by project and environment. Refer to the following sections to configure this sample.
Cloud Code
Publish the following scripts in the Unity Cloud Dashboard:
| Script | Parameters | Description | Location in project |
|---|---|---|---|
DailyRewards_GetStatus | None | Called at startup to retrieve the current status of the event from Cloud Save, update it, and then return it to the client. | Assets/Use Case Samples/Daily Rewards/Cloud Code/DailyRewards_GetStatus.js |
DailyRewards_Claim | None | Called in response to a reward claim request to verify eligibility, grant the appropriate day's reward, and then update the user state on Cloud Save. | Assets/Use Case Samples/Daily Rewards/Cloud Code/DailyRewards_Claim.js |
DailyRewards_ResetEvent | None | Resets the daily rewards state on the client to simulate the beginning of a new month's rewards. | Assets/Use Case Samples/Daily Rewards/Cloud Code/DailyRewards_ResetEvent.js |
Note: The Cloud Code scripts included in the Cloud Code folder are local copies because you cannot view the sample project's dashboard. Changes to these scripts do not affect the behavior of this sample because they are not automatically uploaded to the Cloud Code service.
Economy
Configure the following resources in the Unity Cloud Dashboard:
| Resource type | Resource name | ID | Description |
|---|---|---|---|
| Currency | Coin | COIN | A possible reward that populates the calendar. |
| Currency | Gem | GEM | A possible reward that populates the calendar. |
| Currency | Star | STAR | A possible reward that populates the calendar. |
| Currency | Pearl | PEARL | A possible reward that populates the calendar. |
This sample also uses Addressable Assets to implement the sprite icons for all Economy currencies. As the developer, you can add the Addressables address of the icon for each currency directly in the Economy dashboard, and then retrieve it at runtime without needing to change your code. This is helpful if for example, you want to swap in holiday-themed sprites by changing the address in your dashboard instead of updating your app. To do this for each currency:
- Select the currency you want to edit.
- Under Custom data, click the plus (+) icon to add a custom JSON script.
- Add the
spriteAddressvalue, along with the corresponding Addressable address string, as demonstrated by the following samples:
Custom Coin data
{
  "spriteAddress": "Sprites/Currency/Coin"
}
Custom Gem data
{
  "spriteAddress": "Sprites/Currency/Gem"
}
Custom Star data
{
  "spriteAddress": "Sprites/Currency/Star"
}
Custom Pearl data
{
  "spriteAddress": "Sprites/Currency/Pearl"
}
This configuration allows the service to determine each currency's Addressable address and initialize all icons with the proper sprites. Later, when the application needs the icons (for example, when showing the currencies granted for claiming a daily reward), it uses that currency's ID as a dictionary key to quickly find the associated sprite.
This functionality occurs in the sample's EconomyManager.cs script, in the InitializeCurrencySprites method that is called at startup to initialize the dictionary with all currency icons, and the GetSpriteForCurrencyId method that looks up currency IDs (such as COIN) to find the associated sprite.